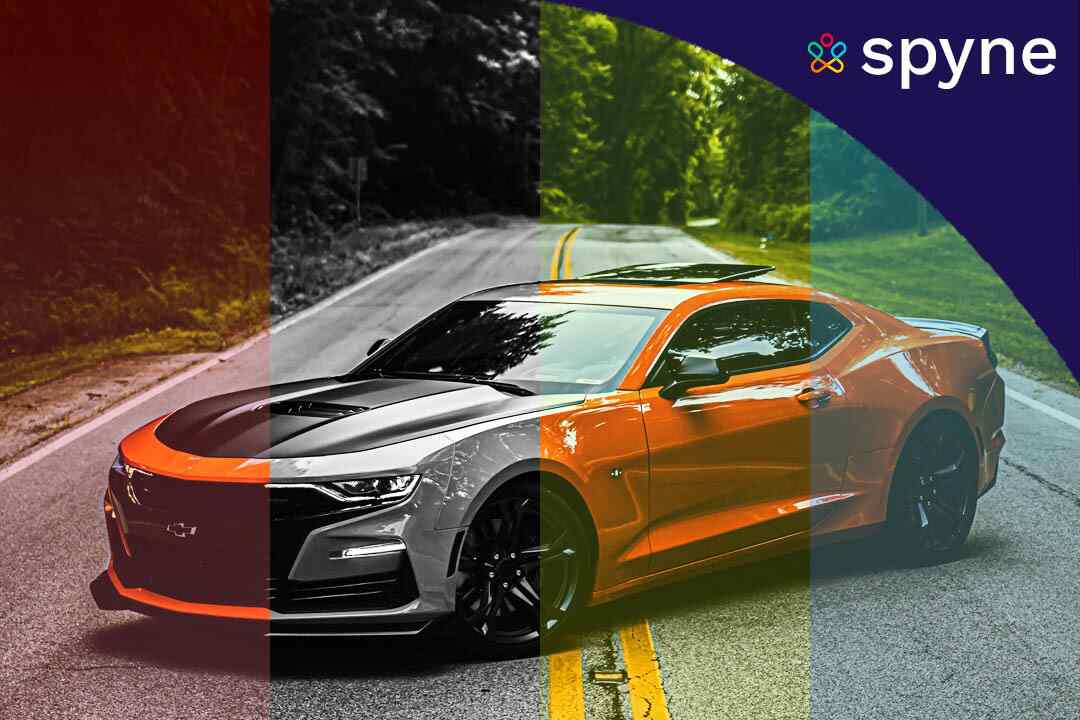

In today’s digital age, photography has become an integral part of our daily lives, whether sharing moments on social media, creating memories, or creating art. Photo editing style has become an essential part of photography, allowing photographers to enhance their images and create unique signature styles. In this blog, we will explore different image editing styles and techniques photographers and amateurs use.
From the tiniest tweaks to the most advanced editing methods, we’ll explore the many techniques used to create beautiful images, covering everything from color grading and retouching to special effects and blending techniques. Join us on our journey to discover the beautiful world of photo editing.
What Is Photo Editing Style?
A photo editing style refers to a specific set of adjustments or effects that are applied to a photo to achieve a particular look or mood. It can range from subtle adjustments to major transformations that completely alter the appearance of an image. These photo editing styles can create unique and compelling visuals and are powerful tools for photographers and designers.
Once a photographer is done clicking pictures, they have to edit them to showcase the images to the world; this is where their editing style plays a considerable role.
For Example, you can find hundreds of photography pages on Instagram with great content. Still, you will only follow a few, and this is because you only liked the editing styles of the pages that you ended up following.
It doesn’t matter what photo editing software you use as long as you are thorough with the particular software and have created a unique style for yourself that helps you stand out from all competition. And this is essential as every photographer must have a distinctive persona in their field.
And as it comes to creating your photo-editing style, just remember that outsourcing photo editing is also an art, which means that no rules or laws are stopping you from creating your own identity. So, you need to create a unique editing style for yourself and own it.
So if you are someone who is looking for new photo editing styles to build on or even if you have grown tired of your old editing style and want to try out something new, we here at Spyne have brought you some of the best photo editing styles that you should try in 2023. If you want to remove the image background automatically, you can use the Spyne tool to remove the background.
What are the Benefits of Using Photo Editing Styles?
There are several reasons to use photo editors:
- Increase visual appeal: By using photo editors, you can improve the visual appeal of your photos, making them look more attractive and attractive.
- Achieve consistency: Image editing helps you achieve consistency and demand between images, essential for creating consistent work.
- Show Mood: Using decorative images can help you express the mood or feeling of the painting, whether it creates a nostalgic or dreamy effect or causes stress and anxiety.
- Save time: Photo editing saves time by letting you apply a set of presets to your photos instead of starting from scratch every time.
- Stand Out: Using custom or custom photo editing templates, you can create templates that stand out and stand out from others that will use different types of editing.
Photo editing can be an essential tool to help you create compelling and memorable photos, whether you’re a professional photographer, a community influencer, or just someone who wants to beautify your photos.
Top 12 Photo Editing Styles for You!
1. The Vintage Edit
This style is for you if you want to give your photo a dramatic effect. This Editing Style has been around for some time, and people just can’t get enough of it!
This Style is more frequently used in portrait, wedding, product, and fashion photography. For this edit, you must focus on the colors blue, green, red, and yellow, giving the picture a vintage vibe. This style will help you quickly grab people’s attention.
A vintage edit resembles the Matte look we will discuss later in this blog.
To imitate the color reproduction of the film, you have to make the color look slightly washed out. This is also a great photo editing style for travel pictures, as the vintage edit is supposed to make us feel nostalgic.
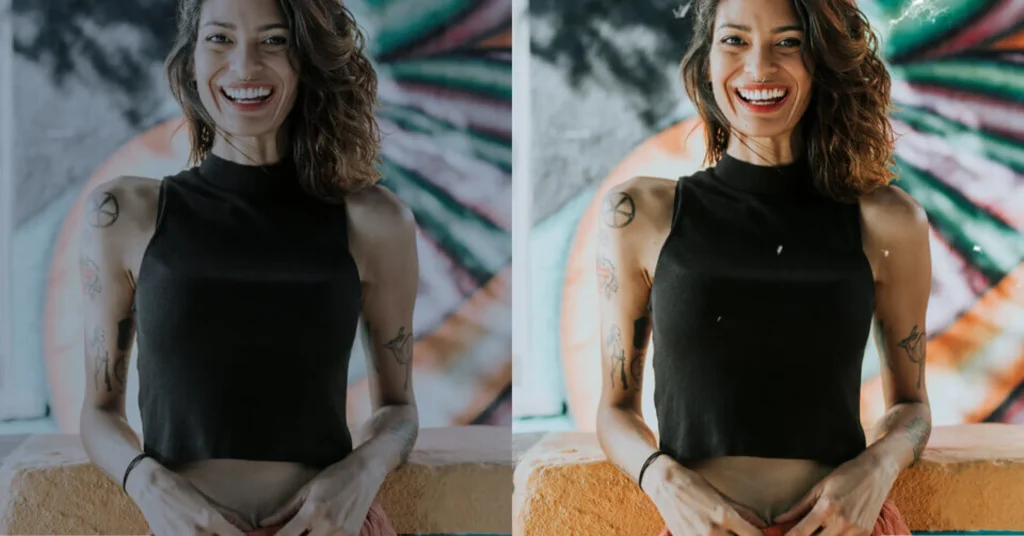
2. The Clean and Natural Edit
We at Spyne believe that going for a clean and simple edit on your images is the best style you can work on. The primary objective of this style is to make the image look natural, smooth, and, most importantly, realistic. This style gives its viewers an accurate depiction of what the photographer experienced in real life.
If the image has a busy background and you want to clear the distractions from the image, you can automatically remove bg from any sort of image in seconds. By doing that, you can remove the image bg and then add a new background to your image.
This is one of the most basic still, loved editing styles of all time.
But the clean edit doesn’t mean you don’t have to edit the image. You still have to adjust color temperature and white balance in post-production. In short, you’ll still have to make the adjustments that make the image look more lifelike and clean.
Ensure you stay focused on sharpening and smoothing, as it may cause the image to lose its original vibe, which would beat the whole point of this particular editing style.
It is a great style to try, not only because it looks classic and is not going to be around for a while.
3. The Matte Look
Matte usually refers to a Surface, Paint, or Colour that is dull, flat, and doesn’t reflect much light. To understand it better, you can also think of Matte as the opposite of something shiny or reflective. The matte look has taken social media by storm in the past few months. People have used various photo-editing apps to achieve this look from their photos. This edit might not entirely sell you as it washes those colors a bit, but you should try it because of its popularity.
This style also gives the feeling that the photo has been clicked through a film camera. But thanks to photo editing tools, you don’t have to own a film camera to get this vibe from your photos.
This style is like a filter to your photo, giving a dramatic black and grey look. This Style is mainly used for landscape, portrait, and street photography.
4. The High Contrast Edit
As you might already know, Contrast is the difference between the darkest darks and the brightest white of an image. The more you increase the contrast, the better your photo’s dynamic range. And when you decrease the contrast, the difference between the blacks and whites begins to thin.
Increasing your image’s contrast is a great way to make sure that your image has an impactful look. When you increase the contrast of your image, the vibrancy also starts to look better, making the shadows look very real. This Style is an excellent option for you to add depth to your image.
This edit makes the image look dramatic as well as edgy. And this style can be applied to either a colored image or a black-and-white image.
5. The Classic Black and White
The Black and White edit is classic and has recently gained popularity. This image editing style gives a theatrical vibe to the image and is mainly used when some storytelling is involved. The best part about this style is that you can use it with any photo you want. Removing colors from an image helps you witness some aspects of the image that you would not have noticed otherwise. The Black and White edit makes the photo much more transparent, allowing you to see more detail.
And when we talk about Black and White, there are a lot of variations that you can try within this style. You can play around with the contrast or even the color temperatures. For Example, if you increase the difference of a black-and-white image, you’ll see much more detail than before as the contrast helps the image look more defined.
The Black and White edits can never go out of style, not just because they are classic but also because it makes images way more interesting. Applying a black-and-white filter to a simple image can make it pleasing. But you have to ensure that you have the perfect balance of contrast, as very little contrast can make your photo lose its impact, and too much of it can make the image look too sharp or unrealistic. This black-and-white editing style works great for portraits and wedding photography.
6. The Monochrome Edit
Before talking about the Monochrome Style of photo editing, we would like to tell you that monochrome and black and white are not the same. Most people think these two are synonyms, which is not the case. Monochrome photos are made up of variations of a single color and nothing else. And it can be any color, But black and white images are just made up with the interpretation of the grey color.
A monochromatic image is generally represented using different shades of Black, Red, Purple, and Blue.
7. The HDR Look
HDR stands for High Dynamic Range. This edit creates a great dynamic range between the light and dark parts. This edit is used for landscape images to give them that crisp and sharp look.
When making adjustments to the brightest and the darkest parts of the image, ensure that you do not introduce distortion into the picture, as this is very common when you try to brighten up the shadows.
8. Cross Processed
If you like experimenting with colors, this is the style for you. You can edit your images clicked with a digital camera to look like cross-processed images.
The term “Cross Processed” refers to when films were used to capture images. Before digital cameras, photographers used these different chemicals to develop their film reels. Different chemicals would allow the photographer to bring out all these funky colors that people found to be pleasing. But thanks to the photo editing software, you don’t have to deal with chemicals to make your image look funky and vibrant.
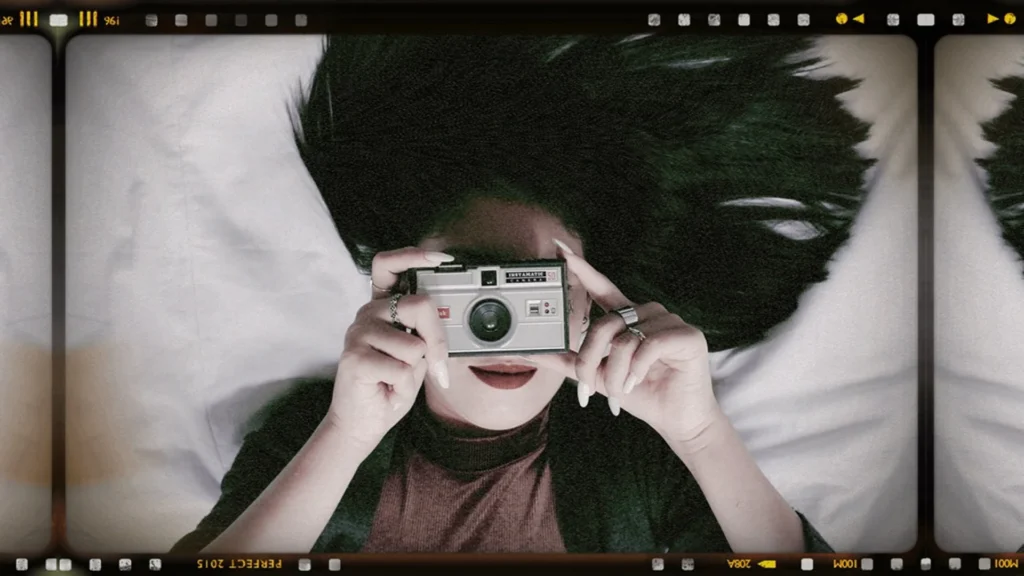
9. Film grain
This style adds simulated film grain to a photo, giving it a textured, organic feel.
Film grain is a visual texture that is often present in film photographs, caused by the way film reacts to light and the chemical processing used in developing it. In digital photo editing, film grain can be added to a photo to give it a vintage or organic look, even if it was taken with a digital camera. The grain’s size, intensity, and color can be adjusted to achieve a specific effect.
10. Duotone
A style that uses only two colors to create a striking, minimalist effect.
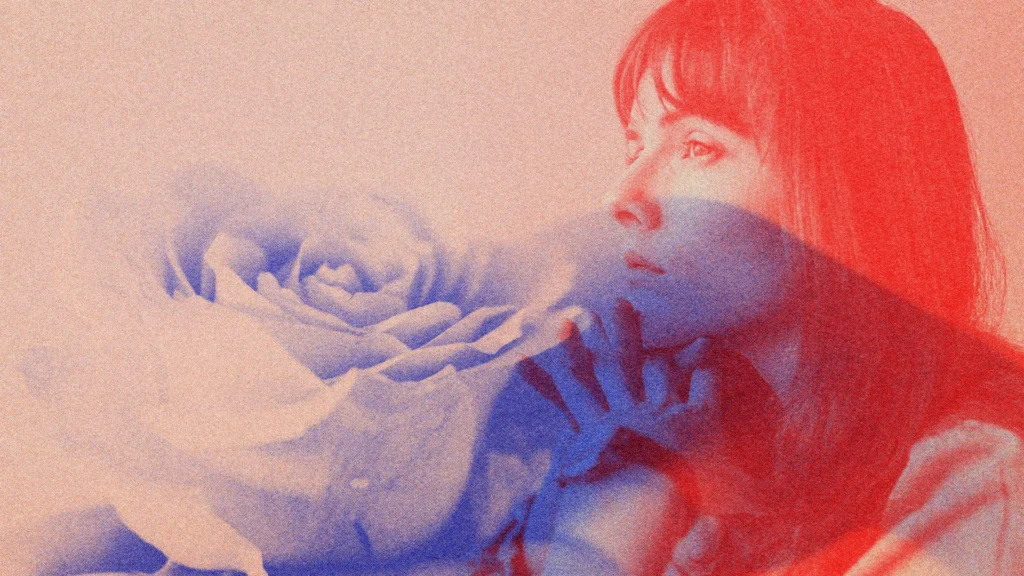
In photo editing, this is often achieved by converting the photo to grayscale and adding two colors to the highlights and shadows. The result is an image with a unique and striking appearance, emphasizing shape and form over color.
11. Retro
Retro is a style that draws inspiration from past eras, often using bright, bold colors and graphic elements to create a nostalgic or vintage look. This photo editing can involve recreating the look of old film photographs or using elements from pop culture from past decades, such as neon signs, vintage cars, or classic typography.
This style is often associated with a fun and playful aesthetic that is popular in advertising and social media.
12. Selective color
Selective color is a photo editing technique that involves desaturating all but one or a few chosen colors in a photo. This creates a dramatic and artistic effect that draws attention to specific elements in the image.
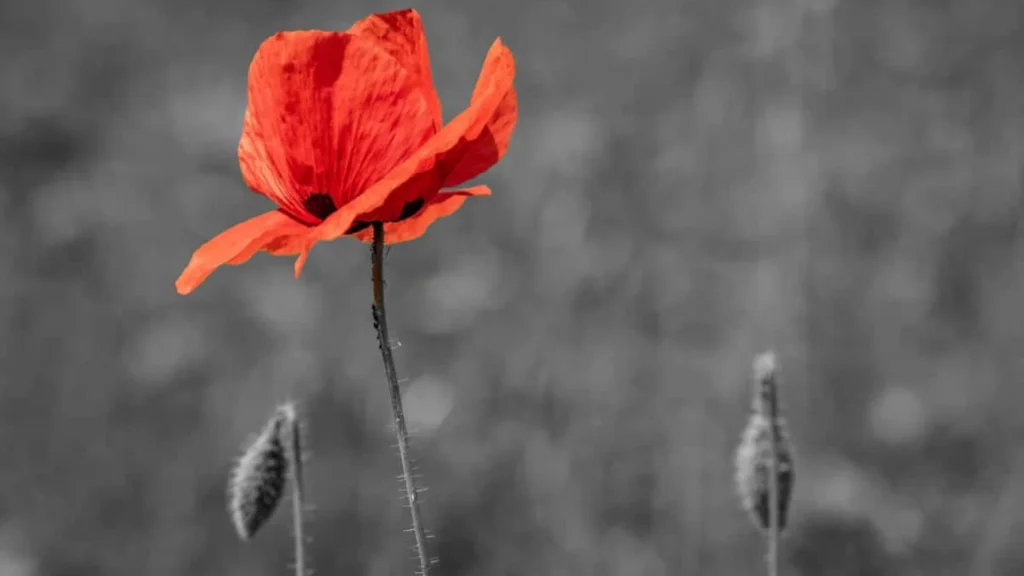
Selective color is often used to highlight certain objects or areas in a photo, such as a red flower in a field of green, a blue sky in a black and white landscape, or a person’s eyes in a portrait.
Selective color can be used in various creative ways, from emphasizing some aspects of a photo to creating a surreal or dreamy effect.
How do I Develop My Own Photo Editing Styles?
After seeing all those different styles, it is natural to think of how you can come up with your very own editing style. And this is not as complicated as you think. To create or develop unique photo editing styles, you need to experiment a lot. And your current audience/followers are going to play a major role in this. Once you start experimenting, you can start posting those images and get other people’s opinions. This is going to be a hit-and-trial method until you come up with a style that is liked by you as well as your audience.
What are the Basics of Photo Editing?
Photo editing is the process of modifying an image to improve its quality, appearance or composition. The basis of photo editing is to change many aspects of the image to create the desired effect. Here are some editing ideas and valuable tools:
- Crop: This tool allows you to cut out unwanted parts of the image and focus on essential details.
- Output: This tool adjusts the brightness and contrast of the image.
- Color Balance: This tool allows you to adjust the tone and color of the image.
- Saturation: This property controls the intensity of the color in the image.
- Sharpness: This tool enhances the detail and clarity of the image.
- Retouch: This includes removing imperfections, wrinkles, or other imperfections from the image.
- Filters: These presets can change an image’s look and feel.
- Layer: This allows you to work on different elements of the image separately, making it easy to adjust parts of the picture.
If you are planning to learn the basics of editing pictures and about the different types of image editing, then you should go and check out our detailed blog on Photo Editing.
Do Professional Photographers Use Presets?
Presets are widely used as they are efficient and they can almost reduce your editing time in half. But when it comes to professionals, professionals use something other than presents. And this is due to the fact that professionals have to reach a very specific end result that their clients desire, which is not really achievable by any present.
However, Professionals can make and use their own present for their branding and marketing. Giving the same look to all their photos helps them establish a brand image and gain followers for their particular style.
How do you Shoot Light and Airy Pictures?
Light and Airy is one of the most liked genres of photography. And we at Spyne will let you in on all the secrets to help you get those smooth, Light, and Airy images.
1. Post-Process your Images
Even though these Light and Airy images look so natural, they also have to go through editing by image manipulation services to look the way they do. And if you are planning to make your images look like these, you also have to post-process them. With different types of photo editing software, you can make your images look Light and Airy. For this, you have to work on the color of the pictures to make them look the way you want.
2. Try and Use Natural Light
This works best if you are only going to use natural lighting for your shoot. So for this, you would recommend you shooting beside a window so that you can get the right amount for the subjects.
3. Use a Shallow Depth of Field
One of the best aspects of these Light and Airy images is that they look smooth. And this is something that can only be achieved by a wide aperture. Hence, it is advised to use a prime lens as it can give you a shallower depth of field.
4. Make Sure your Exposure is Above +0.5
This is a great way of ensuring that your images are Light and Airy. This gives your photos an extra boost of light that they need to look bright.
5. Keep the Surroundings Clean
Do not use too many props, as these images look better when there is next to no clutter in the frame. And this is an essential step to make the photos look, Airy.
Conclusion
There are a lot of editing styles that you can try, but you have to choose one that suits you and as well as entices your audience/clients. It may take a little while to find out which editing style is liked the most by your followers, so during this time, you can experiment with all the styles and filters that you can find. Your Editing Style should not only help you stand out but should also help you effectively depict your photography skills.
You can either try all the trending photo editing styles given above or choose one and build on it until you find your unique style.