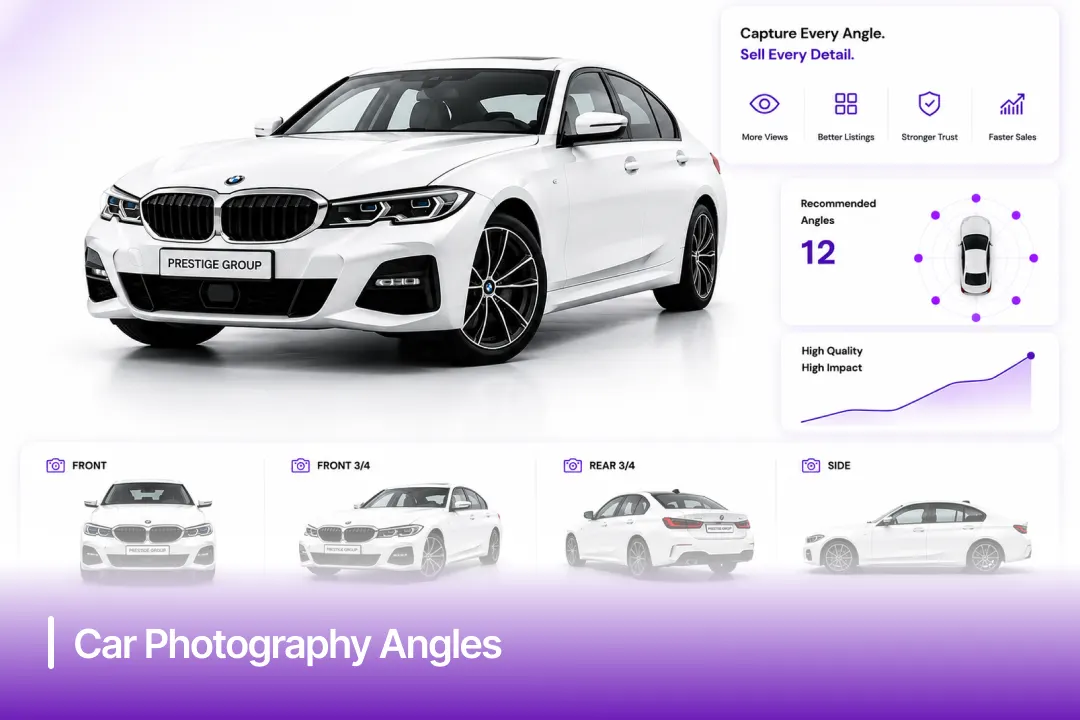

The car photography angles you choose can determine whether a buyer clicks on your listing or keeps scrolling. The right angles showcase a vehicle’s best features, build buyer confidence, and help generate more inquiries, while poor or incomplete photography can drive potential buyers away. The impact is measurable. Industry research indicates that listings with multiple custom images generate a 133% higher click-through rate for new vehicles and a 349% higher click-through rate for used and certified pre-owned vehicles.
This guide goes beyond the basics to explain the best car photography angles, why they influence buyer decisions, and how to create photo sets that help your inventory stand out and sell faster.
What Are Car Photography Angles?
Car photography angles are the specific camera positions used to capture a vehicle’s design, proportions, and condition. Each angle serves a specific purpose, helping them evaluate everything from the car’s overall styling to its exterior condition, interior space, and key details.
More importantly, car photography angles influence how buyers perceive a vehicle. A low angle can make an SUV appear more commanding, while a side profile helps buyers assess body condition and proportions. Close-up shots of wheels, the interior, or the engine bay build confidence by showcasing the vehicle’s condition.
Why Car Photography Angles Matter More Than You Think
Car photography angles do more than showcase a vehicle. They play a key role in effective car merchandising, shaping first impressions, building buyer confidence, and influencing how valuable a vehicle appears before buyers read a single specification. The right angles transform a set of photos into a visual story that builds trust, attracts more qualified inquiries, and ultimately improves listing performance.
Buyer Psychology Starts With the First Frame
Buyers form an impression within seconds of seeing a listing. That first image determines whether they explore the vehicle further or continue scrolling. A well-composed hero shot can instantly communicate whether a vehicle feels sporty, premium, practical, or rugged, long before buyers compare specifications or pricing.
With most car buyers beginning their journey online, photos have become one of the strongest drivers of engagement and purchase intent.
Complete Photo Sets Build Trust
Comprehensive photo coverage signals transparency. When buyers see a listing with photos from every important angle, they’re more confident they understand the vehicle’s condition. Missing angles, on the other hand, often raise questions about what’s being left out.
Complete photo sets also improve merchandising quality, helping dealerships build credibility while increasing the likelihood of attracting qualified buyers.
Camera Angles Influence Perceived Value
The way a vehicle is photographed changes how buyers perceive it. For example, a slightly low camera angle can make the same vehicle appear more confident, premium, and visually striking than a shot taken from above.
Automotive brands have relied on this principle for years because camera position influences perception. Dealerships can apply the same techniques to make every listing more compelling, regardless of the vehicle’s price segment.
While every listing should include a complete set of vehicle photos, the details you emphasize can vary depending on your target buyer. Highlighting the features that matter most to each audience helps create more relevant, persuasive listings.
This table lists which details matter most by buyer type:
|
Buyer Profile |
High-value Detail Shots |
|
Used car buyer |
Headlight lens clarity, paint chips, trim gaps |
|
Luxury car buyer |
Badge placement, chrome trim condition, speaker grilles |
|
Performance buyer |
Brake caliper branding, air intake, exhaust tips |
|
EV buyer |
Charge port condition, aerodynamic detailing |
|
Truck buyer |
Tow hitch, bed liner, wheel arch |
The Essential Car Photography Angles Every Listing Needs
Capturing great vehicle photos isn’t just about using the right camera angles. It’s about knowing what each angle communicates to a buyer. Every successful car photoshoot follows a structured sequence of images, with each angle serving a different purpose, from creating a strong first impression to building trust and highlighting key details.
The car photography angles below are arranged in the order they work best within a vehicle listing. Together, they create a complete visual story that answers buyers’ questions, builds confidence, and encourages more inquiries.
1. Front Three-Quarter (The Hero Shot)
The front three-quarter angle captures the vehicle from roughly 45 degrees to the front corner, showcasing the grille, headlights, hood, front fender, and part of the side profile in a single frame. It delivers the most complete view of the vehicle, making it the ideal hero image for almost every listing.
This is the first photo buyers see, so it plays a major role in shaping their first impression. A well-executed front three-quarter shot highlights the vehicle’s design, proportions, and character, encouraging buyers to explore the rest of the listing.
How to capture the hero shot:
- Position the camera slightly below hood height at a 40-45° angle.
- Turn the front wheels 15-20° toward the camera to create a more dynamic stance.
- Shoot during golden hour for softer light and better body definition.
- Use a 50 mm focal length and maintain enough distance to avoid wide-angle distortion.
Pro tip: Turn the steering wheel just enough to reveal the brake caliper through the wheel spokes. It’s a subtle detail that adds depth and makes the image look more professionally composed.
2. Rear Three-Quarter
The rear three-quarter angle captures the vehicle from roughly 45 degrees behind the rear corner, showcasing the taillights, rear bumper, trunk or tailgate, and part of the side profile. It complements the front three-quarter shot by giving buyers a complete view of the vehicle’s exterior.
This angle is especially important for highlighting design elements such as taillights, spoilers, diffusers, and exhausts. For used vehicles, it also reinforces transparency by showing another key perspective buyers expect to see before making a decision.
How to capture the rear three-quarter:
- Position the camera at the same height as the front three-quarter shot.
- Stand at approximately a 45° angle behind the rear corner.
- Keep the entire rear profile and side panel visible in the frame.
- Ensure the lighting is even to preserve detail and body contours.
Pro tip: Make sure the rear wheel is fully visible and slightly turned toward the camera. A clearly defined wheel adds balance to the composition and creates a stronger visual impression.
3. Driver’s Side Full Profile
The driver’s side full profile is captured with the camera positioned 90 degrees to the side of the vehicle, showcasing its full silhouette. It provides a clear view of the vehicle’s length, roofline, body proportions, door alignment, and wheel placement in a single frame.
Among all car photography angles, this is one of the most informative. It helps buyers assess the vehicle’s overall condition by revealing details such as panel alignment, paint consistency, and body lines that may not be visible from three-quarter angles.
How to capture driver’s side full profile:
- Position the camera at door-handle height.
- Keep the wheels straight for a balanced appearance.
- Use a 70- 100 mm focal length to minimize distortion.
- Step back far enough to fit the entire vehicle in the frame without cropping.
Pro tip: Always include both the driver’s and passenger’s side profiles in your listing. Complete side coverage reinforces transparency and gives buyers confidence that every part of the vehicle has been photographed.
4. Passenger’s Side Full Profile
The passenger’s side full profile completes the vehicle’s exterior coverage by showing the opposite side of the car from a 90-degree angle. Together with the driver’s side profile, it gives buyers a complete view of the vehicle’s body, proportions, and overall condition.
Many dealerships only photograph the driver’s side, but including both profiles builds greater buyer confidence. It demonstrates transparency by allowing buyers to inspect the entire vehicle, including any wear, paint condition, or panel alignment that may differ from one side to the other.
How to capture the passenger’s side full profile:
- Match the camera height and distance used for the driver’s side profile.
- Keep the wheels straight and the vehicle centered in the frame.
- Use the same focal length to maintain consistent proportions across both images.
Pro tip: Capture both side profiles under the same lighting and composition. Consistent images create a more professional-looking gallery and make it easier for buyers to compare the vehicle from every angle.
5. Straight Front
The straight front angle captures the vehicle head-on, placing the grille, badge, headlights, and front bumper at the center of the frame. It provides buyers with an undistorted view of the vehicle’s front-end design, making it easier to compare similar models across listings.
This angle highlights styling details that may be less noticeable in three-quarter shots, such as the shape of the headlights, grille design, and brand badge. It also gives buyers a clearer sense of the vehicle’s overall condition and symmetry.
How to capture straight front:
- Position the camera directly in front of the vehicle at a centered, eye-level angle.
- Align the hood emblem with the center of the roofline to maintain perfect symmetry.
- Keep the wheels straight and ensure both headlights are equally visible.
- Use even lighting to preserve detail across the front fascia.
Pro tip: Small alignment errors are easy to spot in a straight-on photo. Take a moment to check that the vehicle is perfectly centered before pressing the shutter.
6. Straight Rear
The straight rear angle captures the vehicle directly from behind, centering the rear bumper, tailgate or trunk, taillights, and badging in a perfectly symmetrical frame. Together with the straight front shot, it gives buyers a complete, undistorted view of the vehicle’s exterior.
This angle helps buyers accurately assess the vehicle’s rear design, proportions, and overall condition. It’s particularly valuable for EVs, luxury vehicles, and modern SUVs, where distinctive taillight designs, rear styling, and badging often influence buying decisions.
How to capture straight rear:
- Position the camera directly behind the vehicle at the same height used for the straight front shot.
- Center the vehicle carefully to maintain perfect symmetry.
- Keep the entire rear profile visible without cropping.
- Use even lighting to preserve details across the rear fascia.
Pro tip: Match the framing and camera height of the straight front shot. Consistent front and rear images create a more polished gallery and make it easier for buyers to evaluate the vehicle from every angle.
7. Low Angle (Worm’s-Eye View)
The low-angle, or worm’s-eye view, is captured with the camera positioned close to the ground and angled upward toward the front or front three-quarters of the vehicle. This perspective emphasizes the vehicle’s stance, height, and road presence, creating one of the most dramatic images in a listing.
A low angle naturally makes vehicles appear larger and more commanding, which is why it’s widely used in automotive advertising. It works particularly well for trucks, SUVs, lifted vehicles, and performance cars, where a bold, powerful appearance is part of their appeal.
How to capture a low-angle view:
- Position the camera close to the ground and angle it slightly upward.
- Shoot from the front or the front three-quarter perspective.
- Keep the horizon level to avoid an exaggerated or distorted look.
- Use this angle as a supporting image rather than replacing your hero shot.
Pro tip: Reserve low-angle shots for vehicles that benefit from a more commanding presence. On smaller sedans or compact cars, a standard eye-level perspective usually provides a more natural and accurate representation.
8. Overhead (Bird’s-Eye View)
The overhead, or bird’s-eye view, captures the vehicle from directly above, providing a unique perspective that highlights its overall shape, roof design, and proportions. Since this angle is rarely included in dealership listings, it can help your inventory stand out from competing vehicles.
This view is especially valuable for SUVs, trucks, and premium vehicles where features such as panoramic sunroofs, roof rails, and overall vehicle footprint influence buying decisions. While it isn’t essential for every listing, it adds meaningful context for buyers evaluating larger or feature-rich vehicles.
How to capture an overhead view:
- Position the camera directly above the vehicle using a drone or another safe elevated vantage point.
- Center the vehicle within the frame to create a balanced composition.
- Shoot in open areas to minimize distracting shadows and background clutter.
- Use this angle as a complementary image rather than a primary listing photo.
Pro tip: If you’re using a drone for commercial vehicle photography in the U.S., ensure the operator holds the required FAA Part 107 certification before conducting the shoot.
9. Wheel Close-Up
A wheel close-up highlights the rim, tire, and brake components, giving buyers a detailed view of one of the most closely inspected parts of a used vehicle. This angle helps showcase the vehicle’s condition while revealing details that aren’t visible in wider exterior shots.
For used car buyers, wheel photos can provide valuable clues about how well a vehicle has been maintained. They make it easier to assess tire condition, wheel finish, and signs of wear such as curb rash or uneven tire wear, helping build confidence in the listing.
How to capture a wheel close-up:
- Position the camera at wheel height, just outside the wheel arch.
- Fill the frame with the wheel, tire sidewall, and brake caliper.
- Use even lighting to preserve texture and finish.
- Capture all four wheels if possible, especially for used vehicles.
Pro tip: Clean the wheels thoroughly before the shoot. Brake dust, dirt, and minor imperfections are far more noticeable in close-up images than they are in person.
10. Engine Bay
The engine bay photo gives buyers a clear view under the hood, helping them assess the vehicle’s overall condition and maintenance. While it isn’t the most visually striking image in a listing, it’s one of the strongest signals of transparency, especially for used vehicles.
A clean, well-presented engine bay reinforces buyer confidence by showing that the vehicle has been cared for. For electric vehicles, replace this image with the frunk or motor compartment to showcase the vehicle’s available storage or drivetrain layout.
How to capture the engine bay:
- Open the hood fully and photograph the engine bay from a slightly elevated angle.
- Keep the entire engine compartment visible within the frame.
- Use additional lighting if needed to eliminate harsh shadows.
- Ensure the engine bay is clean and free of loose debris before photographing.
Pro tip: A portable LED light positioned above the open hood helps illuminate hidden areas and produces a cleaner, more detailed image, especially in indoor or shaded environments.
11. Interior: Dashboard and Front Cabin
The dashboard and front cabin photo showcases the driver’s perspective, highlighting the vehicle’s interior design, technology, and overall condition. It’s one of the first interior images buyers look at when evaluating comfort, features, and day-to-day usability.
A well-composed front cabin shot should clearly show the dashboard, steering wheel, instrument cluster, infotainment screen, center console, gear selector, and front seats. Together, these details help buyers assess the vehicle’s technology, cabin layout, and level of care.
How to capture an interior view:
- Photograph the interior from the open driver’s door with the camera positioned at seat height.
- Angle the camera toward the dashboard and center console.
- Turn on the infotainment system and instrument cluster before shooting.
- Clean the dashboard, steering wheel, and touchscreen to remove fingerprints and dust.
Pro tip: Keep the steering wheel straight so the instrument cluster remains clearly visible. A balanced composition makes the cabin look more spacious and easier for buyers to evaluate.
12. Rear Seat Space
The rear seat photo gives buyers a clear view of passenger space, seating comfort, and interior condition. It’s especially important for families and buyers comparing SUVs, crossovers, and sedans where rear-seat practicality influences the purchase decision.
This angle should showcase the rear seats, legroom, headroom, seat materials, and overall cabin condition. For SUVs and minivans with a third row, include separate photos of both the second- and third-row seating areas to give buyers a complete understanding of the interior layout.
How to capture rear seat space:
- Photograph the rear cabin from the open rear door at seat height.
- Frame the image to show the seating area, legroom, and headroom.
- Keep the seats clean, upright, and free of personal items.
- Use natural or supplemental lighting to evenly illuminate the cabin.
Pro tip: Show the rear seating area exactly as it is. Accurate car interior photos build buyer confidence and set realistic expectations, especially for vehicles with compact rear cabins.
13. Trunk/Cargo Area
The trunk or cargo area photo highlights the vehicle’s storage capacity and everyday practicality. For many buyers, especially families and SUV shoppers, this is an important image for evaluating whether the vehicle meets their lifestyle needs.
Show the cargo area with the trunk or tailgate fully open, ensuring the load floor and available storage space are clearly visible. If the vehicle features fold-flat rear seats, a power liftgate, underfloor storage, or cargo organizers, include them to showcase added functionality.
How to capture truck/cargo area:
- Open the trunk or tailgate fully before photographing.
- Position the camera to capture the entire cargo area in a single frame.
- Remove personal items and unnecessary accessories from the storage space.
- Use even lighting to accurately represent the depth and dimensions of the cargo area.
Pro tip: If the rear seats fold flat, include an additional photo with the seats folded down. It gives buyers a better understanding of the vehicle’s maximum cargo capacity.
14. Detail Close-Ups
Detail close-ups highlight the design elements that give a vehicle its character. Features such as the headlights, taillights, grille, badges, alloy wheels, and trim deserve dedicated photos because they help buyers appreciate the vehicle’s craftsmanship and unique styling.
These images add depth to a listing by drawing attention to the finer details that wider shots often miss. They’re especially effective for showcasing premium finishes, distinctive design features, or recent upgrades that can influence a buyer’s decision.
How to capture detail close-ups:
- Photograph key design elements such as the headlights, taillights, grille, badges, and trim.
- Use a telephoto lens or optical zoom to isolate the subject and reduce background distractions.
- Focus carefully to keep details sharp and well-defined.
- Shoot in soft, even lighting to preserve texture and finish.
Pro tip: Use your smartphone’s 3× optical zoom or an 85-135mm lens on a dedicated camera. The longer focal length creates cleaner, more professional-looking close-ups with minimal background distraction.
How to Take Professional Car Photos?
The right camera angle is only part of a successful car photoshoot. Lighting, composition, and preparation determine whether your photos look professional and inspire buyer confidence.
Best Practices
- Shoot during golden hour or on overcast days for soft, even lighting and minimal reflections.
- Use a 50mm focal length (or your smartphone’s 1× lens) to capture natural-looking proportions.
- Step back instead of using digital zoom to maintain image quality.
- Clean the vehicle thoroughly, especially the wheels, windows, dashboard, and touchscreen.
- Use a CPL filter (if shooting with a camera) to reduce reflections and enhance paint color.
- Keep the background simple so the vehicle remains the focal point.
Common Mistakes to Avoid
|
Mistake |
Why it Matters |
|
Shooting in harsh midday sun |
Creates strong shadows and distracting reflections |
|
Cropping the wheels or bumpers |
Makes the vehicle appear incomplete |
|
Positioning the camera too high |
Flattens the vehicle’s stance and proportions |
|
Using digital zoom |
Reduces image quality and sharpness |
|
Photographing a dirty vehicle |
Dust, fingerprints, and smudges are exaggerated in photos |
|
Showing only one side profile |
Reduces transparency and buyer confidence |
|
Leaving the front wheels perfectly straight in the hero shot |
A slight turn creates a more dynamic, professional-looking image |
How Spyne Helps Dealerships Create Better Vehicle Listings?
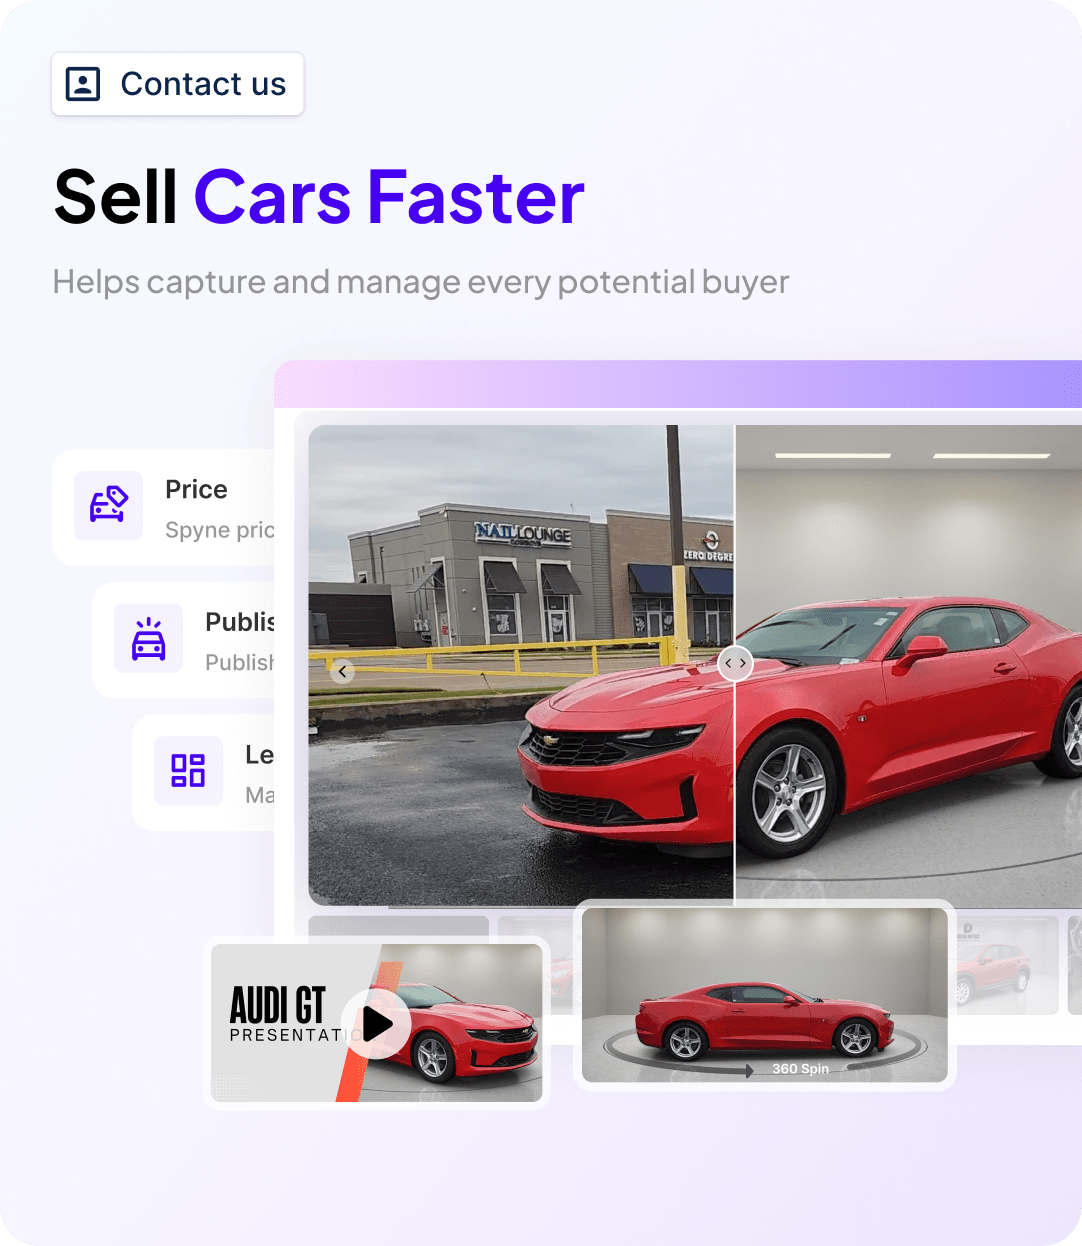
Capturing the right car photography angles is only the first step. To maximize their impact, every image needs to be professionally presented, consistent across your inventory, and optimized for online marketplaces. That’s where Spyne’s AI-powered car dealership merchandising solution helps dealerships streamline the entire workflow, from image enhancement to interactive merchandising.
Capture Professional-Quality Vehicle Images
Spyne’s virtual car photography studio transforms ordinary vehicle photos into studio-quality images with AI-powered enhancements, helping dealerships maintain a consistent, professional look across every listing.
Optimize Every Vehicle Listing
- AI background replacement: Replace cluttered or distracting backgrounds with AI background replacement to create clean, studio-quality vehicle images that keep the focus on the car.
- Number plate blur: Protect customer privacy while reinforcing dealership branding using the number plate blur tool, which automatically masks license plates without compromising image quality.
- Car color changer: Help buyers visualize different vehicle variants with the car color changer, allowing them to explore multiple paint options and build a stronger emotional connection with the vehicle.
Create a Richer Buying Experience
- Rotating car tours: Build buyer confidence through rotating car tours, giving shoppers an interactive walkaround that lets them inspect the vehicle from every angle.
- Car visualizer: Recreate the showroom experience online with the car visualizer, enabling buyers to rotate, customize, and explore vehicles in an immersive 3D-like environment.
- Video tours: Complement your photo gallery with video tours that showcase the vehicle’s design, features, and condition through engaging walkaround videos.
Together, these AI-powered merchandising tools help dealerships create richer listings, build buyer confidence, and generate more qualified inquiries from every vehicle they advertise.
Conclusion
Great vehicle photography is about more than capturing attractive images. It’s about helping buyers evaluate a vehicle with confidence before they ever visit your dealership. Every angle in a listing serves a purpose, from creating a strong first impression and building trust to highlighting the details that influence buying decisions.
The most effective listings follow a consistent photography strategy rather than relying on a handful of good shots. By combining the essential car photography angles with proper lighting, thoughtful composition, and complete photo coverage, dealerships can build a stronger car merchandising strategy that creates richer listings, builds buyer confidence, and generates more qualified inquiries.
If creating professional, consistent vehicle photos at scale is a challenge, AI-powered merchandising can help streamline the process. Book a demo with us to see how dealerships use AI to create studio-quality vehicle listings, interactive merchandising experiences, and inventory that captures more buyer attention from the very first click.