
Buyers make their decisions the moment they can see themselves inside the car.
Recent research in consumer psychology validates this instinct. A 2024 study on Automotive 3D Interactive Display Marketing, revealed that immersive and lifelike visuals dramatically boost emotional engagement and purchase intent.
And it makes perfect sense , when shoppers can virtually step inside a vehicle and feel its materials, textures, and layout, they’re already halfway to saying yes.
While exterior shots might grab attention, it’s the interior that earns trust. Buyers instinctively zoom in on the dashboard layout, the steering wheel design, the infotainment interface, the seat stitching, the ambient lighting, all the touchpoints that make a car feel like theirs.
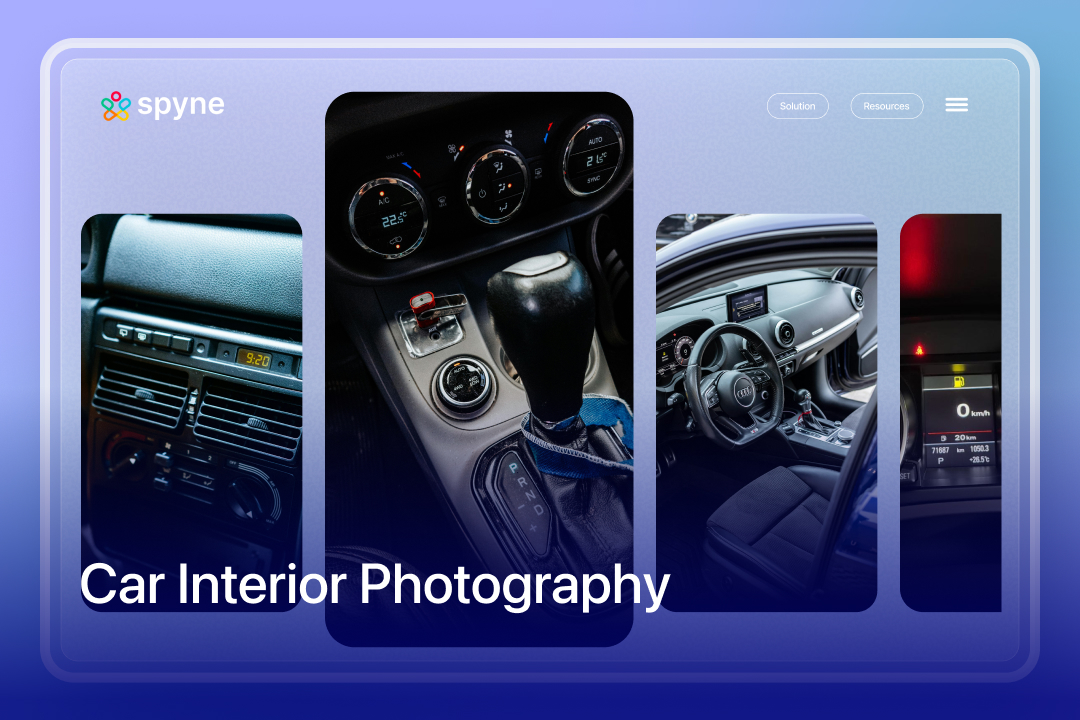
This guide on car interior photography provides a structured playbook for car dealerships, marketplaces, and automotive photographers to capture visuals that build buyer confidence, boost engagement, and move customers further down the sales funnel.
Understanding the Interiors of a Car
Capturing the cabin goes far beyond pointing your camera inside and pressing the shutter. A great car interior photo translates design, comfort, and ergonomics into a visual experience that makes buyers feel the car before they ever sit in it. In car interior photography, understanding the cabin as a living, three-dimensional subject, not just a static space is what separates an amateur shot from a professional visual story.
1. Translating Ergonomics into Visual Appeal
Every interior is designed around human interaction, how easily the driver reaches the controls, how the seats cradle the passengers, and how visibility enhances comfort. Going by car interior photography rules, the goal should be to visualize these ergonomic choices.
- Shoot from angles that mirror the driver’s or passenger’s natural perspective.
- Use slightly elevated or diagonal compositions to make compact cabins look roomier.
- Highlight the intuitive flow of controls and dashboard symmetry, it subtly communicates craftsmanship and usability.
2. Balancing Detail and Depth
A powerful car interior photo strikes a balance between showcasing intricate details (like stitching or trim texture) and maintaining spatial depth. Shooting everything in sharp focus often flattens the image. Instead, use selective focus, a wide aperture (f/2.8–f/5.6) can help isolate tactile elements such as steering wheels or infotainment screens, while softening the background.
- For car dealership listings, create a sequence: start with a wide cabin shot for spatial context, then transition to close-ups of key features.
- Always maintain visual hierarchy, let one focal element dominate each frame to avoid visual clutter.
3. Storytelling with Layout and Perspective
The layout of a car’s cabin often reveals its identity, whether it’s a driver-centric sports car, a family-friendly SUV, or a minimalist EV. Reflect this personality through thoughtful composition during your interior car photoshoot.
- Driver-focused cars: Shoot slightly from the driver’s shoulder or behind the steering wheel to emphasize control and sportiness.
- Passenger-first interiors: Capture from the rear seats, framing legroom, entertainment screens, or panoramic views.
- EVs: Use centered, symmetrical compositions to highlight clean lines, futuristic dashboards, and digital minimalism.
4. Adapting to Different Car Types
Not all interiors photograph the same. The shooting strategy should align with the car’s intent:
- SUVs: Go wide, emphasize height, cabin space, and family comfort.
- Sedans: Focus on proportions and craftsmanship, use lighting to reveal material quality.
- EVs: Keep it sleek and tech-driven, highlight screens, touch interfaces, and lighting accents.
- Vintage Cars: Focus on authenticity, preserve patina, natural tones, and textures that tell the car’s age and story.
Lighting Techniques for Car Interior Shots
Lighting is the creative force behind every professional car interior photograph. Inside a car cabin, light behaves differently than in open spaces: it bounces off metallic trims, seeps through tinted glass, and interacts with multiple surfaces at once.
Below are some car interior photography principles and techniques that reflect both established photographic theory and industry practice.
1. Use Soft, Diffused Lighting to Highlight Authentic Material Feel
Soft, diffused light enhances the tactile quality of leather, fabric, and brushed metal. It minimizes glare while revealing fine surface details.
- Use a large diffuser, softbox, or white reflector to spread light evenly.
- Take advantage of natural daylight from windows or the sunroof for balanced illumination.
- Avoid direct flash or bare LEDs for a more flattened texture and introduce unwanted reflections.
- Let the light wrap gently around contours to preserve the cabin’s natural shape.
2. Add Directional Light to Reveal Contour and Depth
Flat lighting can make even premium interiors appear dull. Directional light sculpts form and adds a three-dimensional quality to dashboard curves and upholstery stitching.
- Position your main (key) light at a 30°–45° angle to the subject to create natural shadows.
- Align lighting direction with your chosen car photography angles to enhance shape and surface contrast.
- Balance with a soft fill or reflector to lift darker zones without erasing contrast.
- Use controlled shadows to enhance realism and guide the viewer’s eye through the frame.
3. Use Reflectors and Fill Panels to Control Cabin Shadows
Car interiors are shadow-heavy environments where small adjustments make a big difference. Strategic use of reflectors or fill panels helps maintain balance and visibility in darker areas.
- Place white or silver reflectors near footwells, dashboards, or under seats to redirect light.
- Use small LED panels (with matching color temperature) to lift deep shadows.
- Avoid over-filling and leave subtle shadow gradients to preserve depth and contrast.
4. Slightly Underexpose to Preserve Texture and Material Detail
Texture defines realism and overexposure destroys it. A slight underexposure ensures every highlight retains form and nuance.
- Dial exposure down by –0.3 to –0.5 EV to prevent blown highlights.
- Check your histogram to ensure whites don’t clip.
- Recover highlight detail during editing rather than pushing exposure in-camera.
- Prioritise authenticity for real materials should look tangible, not overlit.
Best Angles and Composition Tips for Interior Shots
In car interior photography, the right angle helps potential buyers experience the cabin’s design, comfort, and brand character. Each perspective whether from the driver’s seat or focused on fine material details should guide the viewer’s eye and evoke emotion. A well-structured car photography guide can help photographers master these angles, ensuring every shot communicates the car’s story with precision and visual appeal.
1. Begin from the Driver’s Perspective
- Use a wide lens (24–35 mm) for balance, wide enough to capture dashboard and console layout, but not so wide that it distorts proportions.
- Keep lines straight and centered. Interiors have strong geometry; misaligned lines can make luxury cabins feel cheap or uneven.
- Position the steering wheel slightly off-center to give a natural driving feel.
Pro Tip: Automotive photographers on platforms like Reddit’s r/shootingcars recommend shooting from slightly behind the driver’s seat for a truer spatial perspective; it helps maintain realism and ergonomics in composition.
2. Capture the Cabin’s Flow
- Position the camera between or just above the front seats for a full-cabin view.
- Keep both doors open to let in soft, natural light, reducing shadow contrast
- Highlight design symmetry, modern cars like the 2025 BMW iX or Tesla Model S rely on horizontal lines and clean dashboards that look best when evenly framed.
3. Use the Rear Seat for Immersive Depth
- Frame through the middle, with both front seats slightly forward.
- Keep focus on legroom and symmetry while ensuring dashboard visibility.
- Add a shallow depth of field (f/2.8–f/4) to isolate the front layout while maintaining cabin realism.
This approach mirrors how luxury brands like Genesis and Mercedes-Maybach shoot their interiors, showing the space you’ll be driven in, not just drive.
4. Spotlight the Details That Define Character
- Use macro or telephoto lenses (70–100 mm) for clean detail shots.
- Experiment with selective focus to guide attention to a specific feature, for example, the stitching pattern or the gloss of ambient light.
- Use directional diffused lighting from the side to enhance texture and depth.
Example: The Cadillac Celestiq and Mercedes EQS use macro feature shots in their campaigns to highlight 3D-printed trims and ambient lighting showcasing material storytelling through composition.
5. Frame Through Doors and Windows
- Use the door frame or A-pillar as a natural border. It adds layers and context.
- Shoot at eye-level to the handle or dashboard for a grounded, human angle.
- Always manage reflections with a polarizing filter or black cards to control glare on glossy surfaces or touchscreens.
- This technique works especially well for editorial-style EV or crossover photography, where accessibility and openness are key design themes.
6. Compose with Geometry and Intention
- Use leading lines from the dashboard, console, or stitching to guide the viewer’s eye.
- Apply the rule of thirds for natural visual balance.
- Keep symmetry consistent, center consoles, steering wheels, and infotainment screens should align perfectly.
- Eliminate clutter: remove keychains, bags, or personal items that break focus
Pro Tip: A good car interior photography tip would be to bracket exposures (–2, 0, +2 EV) to manage dynamic range to balance bright windows and shadowed footwells for a realistic finish.
7. Add Depth and Scale
- Include foreground elements like seat edges, steering rims, or door trims.
- Adjust aperture based on scene:
- f/2.8–f/4 for artistic isolation (feature focus)
- f/8–f/11 for full-cabin clarity (overview shots)
- Combine depth layers (foreground + midground + background) to draw the eye inward.
This multi-layer approach mirrors how Spyne’s Image Studio automates depth-based composition enhancement for car imagery, ensuring every angle feels lifelike and immersive.
Spatial Constraints of Interior Car Photography
Car interiors are one of the most challenging environments to photograph like confined, glossy, and layered with materials that reflect every source of light. Between infotainment screens, metallic trims, and glass panels, reflections and distortions can easily ruin composition. To master such spaces, read on this car interior photography guide that breaks down the process:
1. Tame Reflections in Screens & Chrome
Reflections are unavoidable but manageable. Even the most experienced photographers rely on micro-adjustments in angle and light balance to minimize glare and keep focus on the design.
- Shift angles, not exposure: A slight tilt or sidestep often eliminates visible reflections without sacrificing brightness or tone.
- Use a polarizing filter: This simple add-on is a must for cutting screen glare and reflections off chrome or glossy dashboards.
- Expose for highlights: In high-contrast interiors, prioritize preserving detail in reflective trims and gear knobs.
- Keep cabin doors open: Letting in natural light reduces the intensity of reflections and balances overall exposure
Pro tip: Avoid placing external light directly opposite reflective surfaces instead, diffuse it using softboxes or car windows for a more natural glow.
2. Make Small Cabins Look Spacious
Compact interiors, especially hatchbacks or sedans, demand a sense of depth and openness that feels inviting online. Achieving this comes down to composition and perspective.
- Shoot diagonally: Angling your camera from front to back expands perceived depth, making interiors look more open.
- Layer through windows: Use car windows or door frames to add visual dimension, this creates a natural storytelling element.
- Avoid extreme wide angles: While tempting, anything below 16mm can distort lines and exaggerate proportions unnaturally.
- Highlight leading lines: Use dashboard contours or seat stitching to draw the viewer’s eye deeper into the cabin.
Pro Tip: A good car interior photography tip would be to try shooting from the back seat toward the windshield for an immersive “driver’s view”, a proven framing style for dealership listings.
3. Smart Gear for Tight Spots
Working inside a car is all about flexibility, both in setup and equipment. Bulky tripods and large lights won’t fit, so opt for gear designed for confined environments.
- Mini tripods or flexible heads: Perfect for mounting between seats, on dashboards, or in footwells without obstructing space.
- Small reflectors or mirrors: Redirect soft light into darker zones like foot areas or rear seats.
- Black cards or cloth: Block unwanted glare on metallic or glass trims for a clean, professional look.
- Remote shutter triggers: Prevent camera shake in awkward shooting angles, especially during long exposures.
Pro Tip: Many professionals now use compact LED panels with variable color temperature to mimic daylight consistency across frames.
4. Use AI Tools to Perfect the Final Image
Once your shots are captured, post-processing is where spatial constraints truly vanish. With AI-based tools like Spyne’s car visualizer app, it is easier than ever to refine tight, reflection-heavy interior shots.
Streamline Editing with Spyne AI
Spyne’s AI-powered car photography suite is designed specifically for dealerships, marketplaces, and photographers looking to achieve professional, consistent results, fast. Whether you’re working with limited space, uneven lighting, or reflective materials, Spyne’s tools can help you correct, enhance, and standardize every image effortlessly.
- Automatic Reflection & Glare Removal: Spyne’s AI detects reflections on infotainment screens, dashboards, and glass, restoring natural clarity without affecting surrounding details.
- Texture & Material Enhancement: Bring out the realistic grain of leather, carbon fiber, and brushed metal so interiors look as tactile as they feel in person.
- Batch Editing for Dealerships: Process thousands of images at once with consistent lighting, color, and framing, ideal for high-volume car listings.
With Spyne, what once took hours of manual retouching now takes seconds, enabling you to maintain visual consistency across every listing and make your cars truly stand out online.
Conclusion
Buying decisions begin the moment shoppers can imagine themselves inside the car and that’s the power of effective car interior photography. With Spyne’s AI-powered tools, every car interior photo can capture the cabin’s true texture, lighting, and design, helping buyers connect with what they see. From glare-free dashboards to lifelike materials, AI brings out depth and realism that standard editing can’t match.
For brands and dealerships, adopting 360 car interior photography creates an even more immersive experience, allowing customers to explore every angle before stepping into the showroom. Processing your interior visuals with AI turns simple images into experiences that build confidence and move buyers closer to their next car.
FAQs
In 2025, buyers make decisions based on immersive visuals. High-quality car interior photography helps customers visualize comfort, space, and design to turn interest into trust. Authentic car interior shots boost engagement, reduce bounce rates, and drive faster online-to-offline conversions.
Yes. AI tools now streamline editing for thousands of car interior shots instantly. From glare removal to texture correction, AI-powered car interior photography automation ensures every image looks consistent, lifelike, and ready for online listings, saving dealerships hours of manual work.
Use diffused daylight from open doors, windows, or the sunroof for soft, even illumination.
Avoid harsh noon sunlight, it causes glare and uneven shadows.
Use reflectors or white boards to bounce light into darker areas like footwells or rear seats.
Position the car in open shade or under a canopy for balanced lighting.
Keep interior lights on (if available) to add warmth and highlight key design features.
For extra control, use portable LED panels with daylight color temperature (around 5600K).
Always check reflections on glossy surfaces before finalizing your shot.
Spyne’s AI instantly edits and standardizes images, removing reflections, fixing exposure, and enhancing texture. This automation allows dealerships to upload listings faster, ensuring consistent, showroom-quality visuals across hundreds of cars.
Yes. With AI-driven composition and lighting suggestions, even non-experts can master photography. Real-time feedback helps teams frame perfect shots, maintain consistency, and achieve studio-quality results without needing advanced equipment or external editors.
Yes. Studies show listings with quality car interior photography see up to 40% higher engagement. Realistic visuals help buyers imagine ownership, boosting confidence and lead conversions, especially in online-first car shopping journeys.
AI tools streamline the car interior photoshoot process, cutting editing time by 80% and ensuring consistency across listings. The results are faster uploads, higher buyer engagement, and a measurable ROI through increased leads and reduced operational costs for dealerships.
360° car interior photography lets buyers explore every cabin angle interactively. This immersive experience increases dwell time, reduces bounce rates, and helps dealerships showcase comfort and quality turning static visuals into virtual test drives.