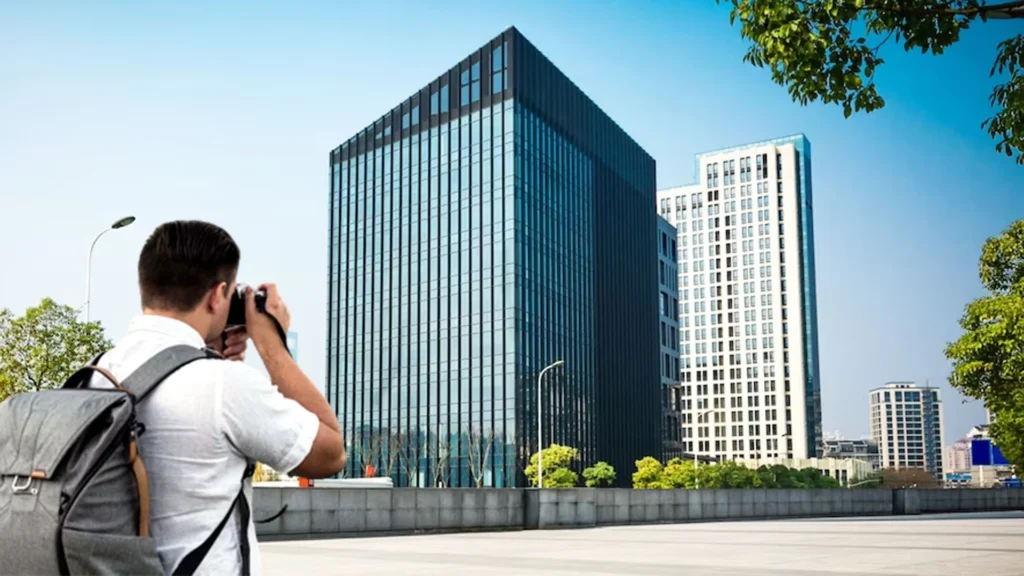
Real estate has always been that one segment getting affected by every minor change in the economy and the market. It means the competition to sell houses is soaring past the roof, and only a few can crack deals with customers. But do you know there’s an easy way to enter your customers’ brains and convince them to buy your property? It’s called Real Estate Photography!
In fact, 68.9% of agents believe that professional real estate photography has helped elevate their property’s brand image. And that 72.2% of realtors believe that high-quality real estate photoshoot has helped them pool in more listings. If you deal in real estate and want to stay at the top of your buyers’ minds, it’s about time to focus on property photography.
This blog focuses on everything you need to know about real estate photography: what it is, what it involves, the equipment you need, guidelines, tips and tricks, advanced real estate photography, pricing, and so on.
Time to dig in!
What is Real Estate Photography?
Real estate photography is basically taking photos that help sell a property. It’s part of the property photoshoot category, which includes other commercial photography like architecture photography. This definition can be divided into two parts: the photos used to sell the property and those that capture what the property looks like.
Starting with the first part photos that help sell property. It may sound obvious that real estate photography should help sell property, but you would be surprised by the countless examples online where it fails miserably. Remember that the primary goal of property photography is to grab and hold attention. Other things, like giving a detailed look at the property, come second.
Second, photos that capture what the property looks like. It is obvious (but often overlooked) that the focus of real estate photography should be the property itself. Forget about humans, animals, or random objects entering the shots. Spending money on clickbait like animals or furniture close-ups is just a waste. Buyers are smart enough to know they only buy the property, not the extra stuff. Including unrelated images will only confuse, mislead, and won’t increase your sales.
What Does Real Estate Photoshoot Include?
Commercial real estate photography is more than just snapping property pictures. It’s all about nailing the composition, lighting, angles, and staging to make the property shine. Inside shots show off room layouts, cool designs, and killer features, giving a taste of the architectural details and livability. Outside shots capture the curb appeal, flaunting the front, backyard, and appealing outdoor features from every angle.
Real estate photographers prefer using wide-angle lenses to capture that wide and spacious vibe. They monitor lighting, ensuring every room is lit, and natural light is on point. Plus, they work their magic in post-processing, tweaking colors, contrast, and sharpness to make the images pop and look super appealing.
Besides, property photography aims to wow viewers with mind-blowing images that grab the attention of potential buyers or renters. These pictures go beyond showing the property’s physical features – they stir emotions and make you crave that sweet space. The ultimate goal is to hook viewers, leaving them with a great impression that pushes them to take action – whether scheduling a visit, making an offer, or diving deeper into the property hunt.
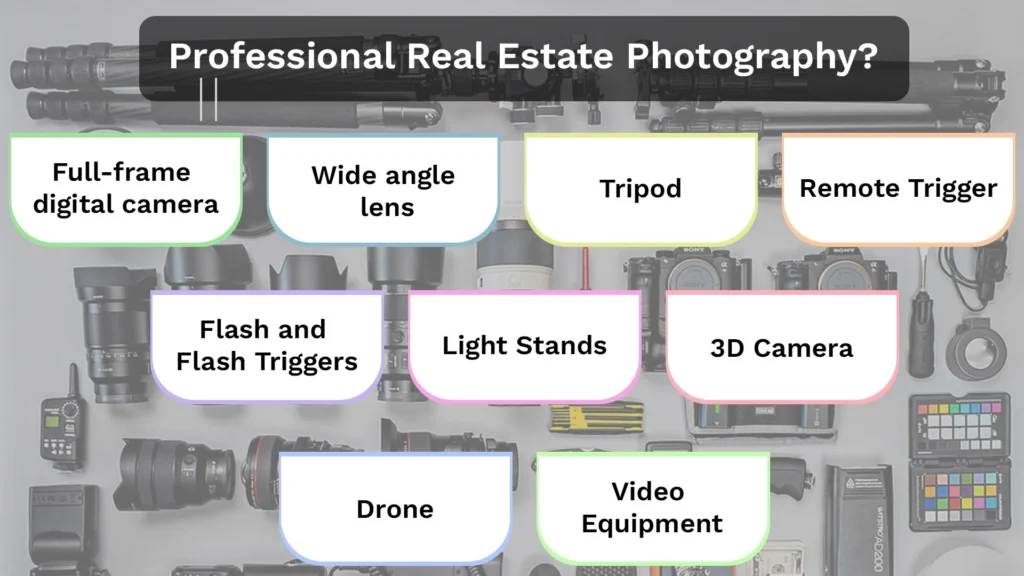
What Equipment Do You Need For Professional Real Estate Photography?
For most property photoshoots, you will need some essential equipment. First, you will need a top-notch digital camera and a sturdy tripod. Wide-angle lenses are a must-have, perfect for capturing spacious areas like living rooms and dining rooms, making them popular among real estate photographers. Remember, good editing software too. It’s essential because real estate photography usually requires some editing nuances to make the shots shine.
Full-frame digital camera
Regarding professional real estate photography, go for full-frame cameras because they can handle those big spaces and deliver top-notch images. Instead of prioritizing megapixels, focus on the sensor size instead. A larger sensor means you will get better-quality shots, even when lighting conditions are not ideal. There are a ton of great cameras on the market, but make sure to do your homework and pick the one that suits your needs the best.
Wide angle lens
If you ask the pros, they will straight up tell you that the ultimate lens for professional real estate photography is a wide-angle one. These bad boys bring out the depth and really make a room feel spacious. So, if you use a full-frame sensor camera, grab a wide-angle lens in the range of 16-35 mm.
However, avoid fisheye lenses or other tricks that make the space look unrealistically huge. It’s a total no-no! This deception only turns off potential buyers when they realize they’ve been fooled. Also, do not remove permanent eyesores or ugly objects from the shots. Always capture the property in a way that’s pleasing to the eye and true to its appearance.
Tripod
Regarding real estate photography, most shots use natural light for the exteriors or whatever lighting is available inside the room. Using a tripod gives you sharper images, especially when using slower shutter speeds. Plus, it keeps things steady, nice, and level.
Besides, those vertical lines will be clean and straight as an arrow. Try shooting from above your head, eye, chest, or table level to play around with different heights using your tripod. Once you’ve experimented, pick the absolute best angle.
Remote Trigger
Remote triggers can trigger the camera and capture a shot without physical contact. The significance of this may take time to become apparent. Still, remote triggers are crucial in eliminating camera shakes that can result in blurry photos or loss of detail. This is particularly pertinent in the realm of property photography, where the use of remarkably low shutter speeds is standard practice. At such slow speeds, even the slightest touch on the camera to initiate the shot can introduce undesirable camera shakes, ultimately leading to unfocused and blurry photographs.
Flash and Flash Triggers
Recognizing that natural light is only sometimes sufficient or superior in real estate photography is essential. In many cases, different areas of a property are not equally well-lit. While the living space might be bathed in ample natural light, places like the bathroom or hallways may be dimly lit. That’s why having a flash at your disposal is always wise.
Additionally, having a flash trigger alongside your flash is highly recommended. This setup lets you position your flash and camera optimally and remotely trigger them without getting tangled up in complex logistical challenges.
Light Stands
When it comes to using flash, it’s only logical to have light stands at your disposal. After all, you need reliable support to mount your second and other lighting equipment. While lightweight frames are suitable for flashguns or strobes, opting for a sturdy and dependable C-stand is the way to go if you work with larger moonlight. It ensures stability and provides a solid foundation for your equipment.
Extra Gears
- 3D Camera
- Drone
- Video Equipment
Real Estate Photography Guide
Real estate photography is crucial in presenting properties in the best possible light and attracting potential buyers or renters. Here is a comprehensive guide to help you capture high-quality real estate photos.

Shooting Wide Angle
Regarding selling homes, space, and natural light are key players. That’s why it’s crucial to showcase the space in the home accurately and expressively. Additionally, shooting wide is the best way to make it happen! Wide-angle shots capture space like a boss, so all the excellent real estate photographers use wide-angle lenses.
When you shoot wide, keep these things in mind:
- You can leave every single wall in a great photo.
- Zooming can totally transform the room’s vibe.
- Shooting wide gives the illusion of a bigger space.
Straightening Vertical Edges
Keep those vertical edges straight. It’s crucial to have the walls looking perfectly upright. To achieve this, you can use a level in your camera’s hot shoe to ensure accurate alignment with the room. Just be careful not to cut off furniture by lowering the tripod accordingly.
If you want to take it up a notch, consider using a Tilt-Shift Lens to tackle this problem. And don’t worry if you missed it during the shoot. In post-production, you can rely on Photoshop’s Lens Correction Tool or Lightroom’s leveling options to fix any wonky converging vertical lines.
Shooting Interiors
When taking interior shots, it’s crucial to use lighting strategically to guide the viewer’s gaze throughout the room. Find an angle that captures the room’s best perspective, showcasing its space and depth. Remember to turn on all the lights in the room to ensure bright lighting.
However, more than relying on window and room lights may be required or offer more control. Adding artificial lighting is a great way to achieve more precise lighting. Another option is using a strobe for consistent brightness.
The mix of outdoor and interior lighting can mess up the color balance when shooting indoors. Try to match the color of the interior lights to the outdoor lighting. But it’s okay if you can’t get the perfect shot. Fix it later in Photoshop using color correction techniques.
Here are some popular camera height recommendations for different situations and areas:
- Vaulted Ceilings: Go as high as possible to capture the height’s full grandeur and stunning shots.
- Kitchens: Shoot at counter height to capture the cozy and inviting kitchen atmosphere.
- Bathrooms: Position the camera slightly above the counter for the best perspective.
Using Flash
Flash is super handy for photographers of all kinds. Real estate photography is especially great for lighting up those dim corners and hidden spots in a room. You can’t adjust the shutter speed to control flash lighting, unlike constant light sources. It’s a different beast. That’s why it’s recommended to have a wireless multi-flash system. You can move those flashes around to get the perfect lighting setup. If you’ve got a removable flash, you can even bounce the light off the ceiling or wall for some decent results. Not perfect, but definitely workable.
Using Light Stands
Small rooms and closets are good with just one light source, but you’ll definitely want more when it comes to extensive areas like family rooms or kitchens. Grabbing a few cheap light stands will let you position your lighting just right. It’s a small investment that can make a big difference in your photography, especially in tricky spots like hallways and stairwells. Get ready to level up your professional game!
Shooting Exteriors
Capture the front of the property from the most flattering angle and during optimal lighting conditions.
Certainly! To make your property listing more appealing, it is important to highlight the following features:
- Landscaping: Features well-maintained gardens and greenery.
- Deck / Patio: Highlight the outdoor living spaces for relaxation and entertainment.
- Pool / Hot Tub: Capture the sparkling pool or inviting hot tub as focal points.
- Outbuildings: Include additional structures such as sheds or garages to showcase the property’s versatility.
Additionally, go for greater heights for better results with exterior shots. Sometimes, a regular tripod won’t cut it, so aim for 6 to 12 feet of elevation. Get yourself a painter’s pole to extend the reach of your tripod. Secure the bar properly to keep your camera safe and sound. Stability is critical, so keep that.
Real Estate Photography Tips to Keep in Mind
You have the equipment, spot-ready, and subject ready to be photographed. But how do you get started with it? Here are some real estate photography tips to keep in mind.

Timing
When it comes to capturing captivating real estate photographs, timing is everything. Opt for early mornings or the golden hour at dusk to achieve the best results. During these moments, the lighting is softer and more diffused, eliminating harsh shadows that could hinder your shots. Taking advantage of these optimal shooting times’ll enhance your real estate photography’s overall appeal and quality.
Staging
To make your real estate shoot a success, there are a few steps you should take. First, swing by the property beforehand to scope it out and determine what gear you need. Plus, give the house a good decluttering and cleaning to maximize those incredible shots. Prepare a quick checklist and use them to prepare.
Comprehensive
Avoid capturing dull, one-dimensional images by standing in each room’s corner. Instead, thoroughly explore all aspects of the property and compose your shots in a way that generates interest and drama. Focus on highlighting the property’s unique elements to create a compelling narrative through your photography. Ensure that your real estate photography shoot encompasses the entire property, allowing prospective buyers to understand its character and all its spaces. Your photos should tell a captivating story that leaves a lasting impression.
Hero Shot
Every property listing should feature a hero shot, which is the standout photo that grabs attention and serves as the captivating cover image for the listing. This image acts as the “moneymaker,” enticing potential buyers or renters to explore the listing further. While the hero shot is typically an exterior photo, don’t be afraid to think outside the box. If the property boasts a beautiful garden or pool, consider incorporating them into the shot for a breathtaking hero image. Aerial shots can also make excellent hero shots as long as they showcase the front of the house.
To create a standout hero shot, it’s beneficial to communicate with the property owners or agents. Find out if there are any particular features or unique aspects of the home that can be highlighted and emphasized in the photo. This collaboration will ensure that the hero shot captures the property’s essence and appeal, drawing in potential buyers.
Observing
Attention to detail is a game-changer for photographers. Even minor changes and subtle information can bring your pictures a new level of nuance and beauty. When staging a house, it’s a no-brainer to clean, declutter, and decorate. However, remember what’s outside the windows. Keep unsightly objects out of the frame, even if they’re visible through the windows. This includes things like trash cans, electric boxes, wires, and parking lots. If possible, angle your camera strategically so that any glare falls on the windows, obscuring the view outside. On the flip side, if the view outside the window is stunning, do your best to incorporate it into the pictures as much as possible. Remember, those little details can make a big difference.
Post Processing in Professional Real Estate Photography
Post-production plays a crucial role in digital photography, and it’s no different for real estate photography. However, it’s important to note that post-production should never be used to deceive or hide flaws. Instead, its purpose is to enhance the viewing experience for potential buyers, showcase the property’s strengths, and provide a comprehensive virtual tour without the need for an actual visit.
Blending Images
You can use this technique in various ways and for specific circumstances, always with the intention of providing a complete and honest representation of the property. The aim is never to deceive or trick the buyer.
Glare
When dealing with situations where the floor creates glare, it may be necessary to capture two exposures. One shot is set to capture the best exposure for the room, while another is focused on capturing the floor. These two images can then be combined during editing to achieve a perfect outcome. A tripod can be beneficial, especially when capturing two precise positions. Your tripod becomes your best friend in ensuring stability and accuracy.
High Dynamic Range (HDR)
Most real estate photographers begin by shooting HDR or High Dynamic Range images. This technique involves capturing multiple exposures, including one for the windows, one for the room, and one for the darker areas. These exposures are then blended to create a final image that showcases the best aspects of each.
Flash Photography
You can simply overpower the mixed light colors with a powerful flash to fix color and light issues. When properly balanced, the flash works like magic, reproducing incredibly accurate colors and instantly brightening dark rooms.
However, using a flash does come with some significant downsides. First and foremost, it can burn a hole in your wallet with its expensive price tag. Flashes are also substantial and bulky and can slow down your workflow. Dealing with light stands adds extra complexity to the whole process.
Luxury Real Estate Photography
The fourth style of photography is a literal combination of the first three and is colloquially called “Flambient” or “Luxury.” In this technique, an ambient, naturally-lit frame is merged with one or more flash layers to highlight the most appealing aspects of each layer. It also incorporates the bad aspects of all three. It takes a lot more time, you have the additional cost of Flash, and it adds much more time to the edit.
Advanced Real Estate Photography
Check out these advanced real estate photography services that can give your business an extra edge. While they may require a bit of investment to nail down, consider incorporating them if you have some extra time and capital to spare. These services will set you apart from the competition and offer a unique selling point to potential clients, making you even more desirable in the market.
Real Estate Aerial Photography
Aerial images have become a must-have in real estate photography, especially when showcasing more significant properties. These shots give people a clear understanding of what they’re getting and reveal hidden areas that would otherwise remain unseen or inaccessible.
Thanks to drones, aerial real estate photography has become affordable and accessible. It’s no longer just an option; it’s a necessity in today’s marketing landscape. With real estate drone photography, you can capture valuable details such as:
- A comprehensive view of the entire property
- Close-up shots of the roof and hard-to-reach features
- The surrounding area, including neighboring properties and nearby amenities
- Property maps and surveys to provide a complete picture
Virtual Property Tours
With technology advancements, customers increasingly ask for Virtual Tours or 360-degree tours. To offer these services, you will need a special camera capable of capturing panoramic shots that cover the entire property. Luckily, there are dedicated virtual tour software options available that simplify the process of transferring and creating a comprehensive virtual tour on your computer. By providing these value-added services, you can gain a competitive edge over your rivals in the market. Stand out from the crowd and impress clients with immersive virtual tours that showcase every corner of the property.
Real Estate Photography Pricing
When it comes to hiring a photographer for a real estate listing, there’s no fixed pricing model. However, most real estate photography packages are based on these three factors:
- By the hour
- Based on the number of images delivered
- Depending on the size of the home
Within these real estate photography pricing models, several factors come into play that can impact the overall cost. Variables such as the photographer’s experience, the size of the house, the number of images required, the extent of services provided, and more can all affect the final price.
Average Real Estate Photography Pricing in the U.S. starts from USD 230 for a basic shoot. This package will include 10-25 listing-ready photos for a 1500-3000 square feet home. And for aerial photography, you may have to spend additional charges of anywhere between $50-$200, depending upon the size of the home.
Similarly, for a 1-minute video for your property photo shoot, it may fluctuate between as low as USD 200 to 7000. For virtual photography, it will be around USD 100-2000.
How AI-led Real Estate photography Services Can Help You?
If this extensive list of real estate photo editing and real estate photoshoot ideas is overwhelming, guess who just got your back? Check out Spyne’s AI-led real estate photography services that let you shoot advanced real estate photography and help with post-processing phases, making the entire process a breeze.
With the help of Spyne’s deep-tech AI photo editing services, you can not only process images in bulk but also apply:
- Image enhancements
- Retouching
- Image cropping and resizing
- Color correction
- HDR blending
- Object removal
This is just one part of the umbrella. Spyne also helps you with the property photoshoot phases. Spyne can offer you exceptional skills as a real estate photographer, offering top-notch illustrations. Thereby saving you time and cost, so you can focus on things that matter. Interesting, isn’t it?
Conclusion
Hope this blog helps you understand the nuances of real estate photography. Remember that 80.2% of buyers believe a high-impact real estate photoshoot is crucial in decision-making. So make sure you produce your property’s best-in-class, advanced visuals and garner maximum attention.
Want to learn more about real estate photography? Or want to dive deep into the best practices of professional real estate photoshoots but in a hassle manner? Talk to us today!