
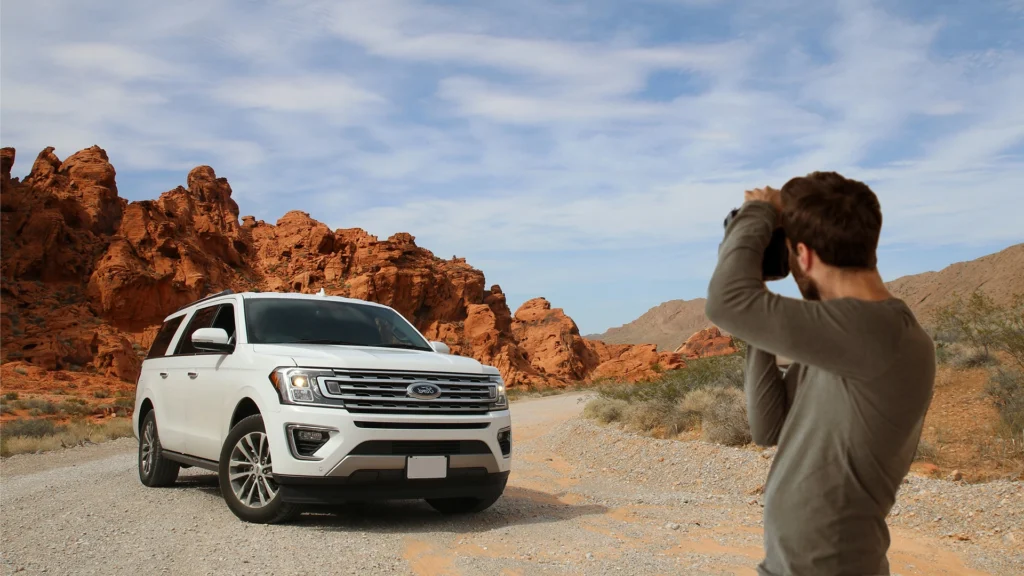
Photographs are the most effective medium for fans or shoppers to check a car out virtually. Through high-quality car photography, people’s passion for cars comes to life, igniting curiosity and educating them about the various aspects of the vehicle. The person behind the lens makes the viewer feel like they are behind the wheel, and for the best results, they need to understand car photography settings. For most people, car photography is a challenging and fun hobby, while for others, it’s a business. For online retailers, proper images are necessary, as they need to list their products online with accurate visuals.
A study by Cox Automotive shows that 90% of car buyers consider photographs extremely important. Moreover, 40% of customers are likely to purchase a vehicle based on images they view online, without seeing the vehicle physically. The number of car photographs per vehicle also impacts customer engagement on your website, especially at the vehicle detail page (VDP) level.
In this blog, we will examine some of the best car photography camera settings that will help improve the skills of automotive shutterbugs.
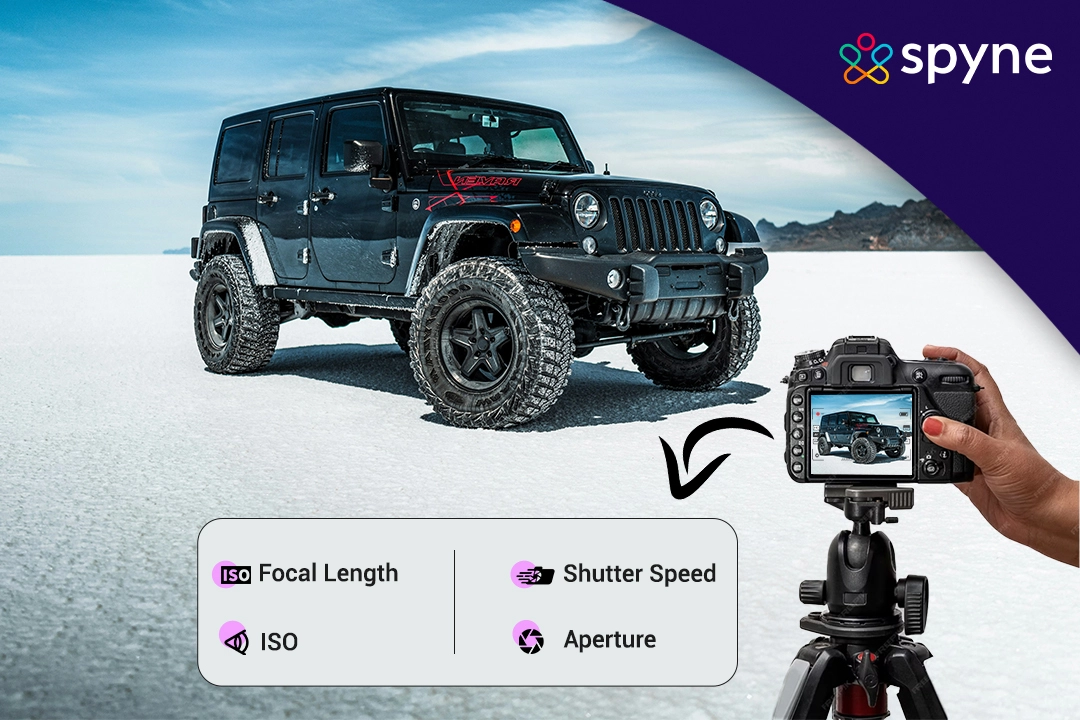
What are Car Photography Settings?
Car photography settings refer to the camera settings that help regulate different parameters of an image that one clicks. To shoot the best car pictures, you, as a Car Photographer, need to understand the workings of your camera. The three pillars of photography, also known as the exposure triangle, are ISO, shutter speed, and aperture. You may also have settings for white balance, focus, image format, noise reduction, stabilization, etc., and mastering them will lead to fantastic photography results.
While the best aperture for car photography controls the area over which light can enter the camera, the shutter speed controls the duration of the exposure, and the ISO speed controls the sensitivity of the camera’s sensor concerning a particular amount of light. Additionally, there are physical car photo settings as well, like the selection of lenses. A car photography lens with a low focal length will have a wider field of view, with less magnification and detailing, and vice versa.

Why do you need to Adjust Camera Settings for Car Photography?
Proper and well-adjusted camera settings are the key to beautiful Car Photography. Unlike most other mainstream products, cars have shiny and reflective surfaces, along with windows and windscreens. This makes dealing with reflections a considerable hassle when photographing cars.
If the car photography settings are not adjusted properly when taking car photographs, you’ll end up with blurred, lifeless-looking car photos that won’t be upload-worthy for your digital platforms. Moreover, you will also have to incur the cost of re-shooting the car.
1. To set the best camera settings for moving car photography, you’ll have to consider different factors, like the location, the car’s angle, and position, light exposure, whether it’s stationary or in motion, etc. As a photographer, you must keep an eye out for these settings to get professional-looking car shots.
2. The exposure of a photograph determines how dark or bright the image will appear when captured by the camera. You can also use car photography presets settings to make things easy for you. Apart from that, you need the best lens for car photography.
3. Once all this is done, you’ll get immaculate car images that will attract the most attention wherever you post them, be it automotive retail platforms, social media, or even car wallpaper websites!
Below, we’ve mentioned some camera setting recommendations about different types of car photography to ensure you have the best camera setup to shoot beautiful images.
What are the Best Camera Settings for Car Photography?
To get the best results for your car photography. You should generally use a low ISO setting perhaps around ISO 100 and a quick shutter speed for stationary car pictures. This will enhance your final result and your pictures will look more appealing. Let’s look at the best camera settings for car photography in various car photography scenarios:
1. Best camera settings for daytime car photography
Overall, the best camera settings for car photography include the following:
1) If you want to keep the car and the background in focus, narrow down the aperture to f/8 and up.
2) If you want to blur the background, opt for a wide aperture of f/2.8 to f/5.
3) Keep the ISO above 100, adjusting it to your shutter speed and aperture.
4) To enhance your car photos, select auto white balance. You can also change this in the post-production stage if you shoot the images in RAW format.
White balance – also called color temperature – is the best camera setting for car photography
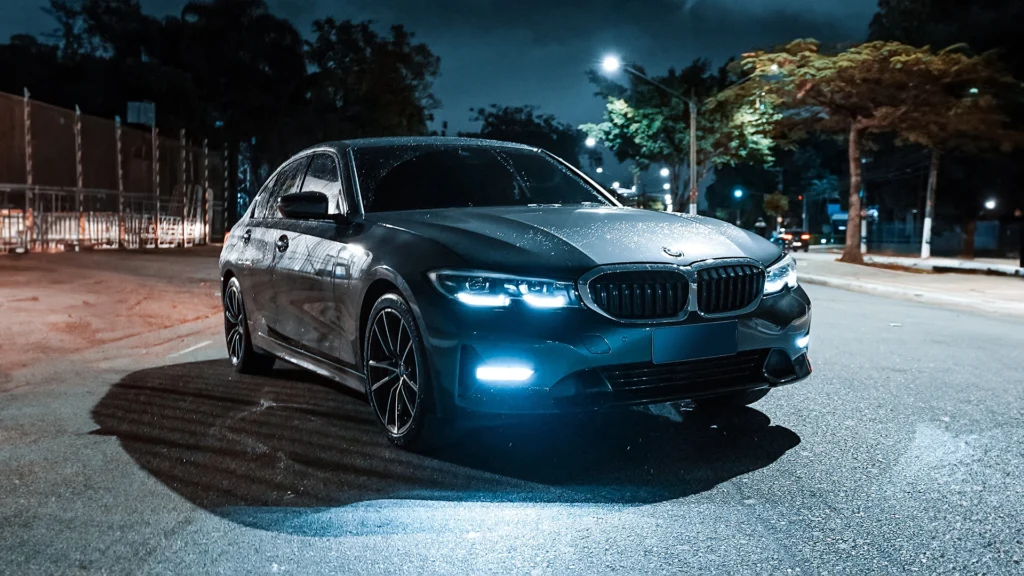
2. Best camera settings for night car photography
Nighttime photography can give us beautiful images, sometimes even more appealing than daytime photography! The key to creating an excellent night car photograph lies in a long shutter speed and a low ISO.
The long shutter speed allows the camera to capture more light, and a low ISO maintains a clear image. The longer the shutter remains open, the better your picture looks. However, this also means any minor movement while the shutter is open will ruin your car photos.
Car photographers should carry a tripod to keep the camera stable during long exposures. You can also use the camera’s timer or remote switch to avoid accidentally shaking the camera by pressing the shutter button.
Use the following best camera settings for car photography at night once your camera is steady on the tripod:
1) Put your camera in manual mode.
2) Use long shutter speeds, specifically between 30 to 60 seconds.
3) Set the aperture around f/11 and use a low ISO, specifically around 100 or 200.
4) Set the white balance camera setting to auto.
Voila! You’ll get tremendous results for night photography with these camera settings. Alternatively, you can use lighting equipment to brighten up the subject appropriately.
3. Camera settings for performing motion car photography
Motion car photography is a whole different ball game when it comes to the level of difficulty. The effects of motion car photography are worth the patience it takes.
Moving car photography settings:
1) Use a shutter speed of at least 1/125. The speed you choose should depend on the availability of light. If you are shooting in broad daylight, crank up the speed for increased detail and less motion blur.
2) Pan the camera side to side to follow the car’s motion.
3) Note that if the best shutter speed for car photography is fast enough, it will compensate for the vehicle’s motion and the direction of your arms as you try to capture the moving vehicle in time.
You need to sharpen their timing and instincts for using the panning technique. Additionally, consider investing in a monopod or gimbal for stability in tracking. It will help you move the camera around smoothly with the connected arm, following the action without any hassle.
4. Camera settings for capturing indoor car photography
The best way to capture your car indoors is to use a tripod that keeps your camera steady, so you can adjust your shutter speed with low ISO to compensate for dim lighting conditions. Alternatively, you can use car photography lighting equipment to brighten up the Car Photography Studio. For indoor car photography, use these camera settings:
1) Use an aperture of f/4 or less for portraits and f/11 for wider shots.
2) Keep the ISO around 100, increasing or lowering it as per your requirements.
3) Select the ‘white balance present’ or choose a custom setting that suits your lighting conditions.
You can also shoot in RAW photo format to avail the best car photo editing settings. In cases where using a tripod is impossible, keep your shutter speed to at least 1/100 to escape the blurry camera shake effect!
5. Camera settings for outdoor car photography
The first thing to consider and think about when taking static car photos outdoors is the depth of field (DOF). Decide if you want a shallow DOF, which makes the car the only sharp object in the photograph, or if you want a deeper one, to include the background where the vehicle is parked. In the latter case, increase the aperture to f/8 or higher.
Use a wide-angle lens or stand at a reasonable distance to get a perfect outdoor shot of the car. The DOF will automatically deepen when you’re further away from the car, even if you shoot at an f/2.8 aperture.
Detailed Camera Settings for Automotive Photography
Photography settings are important because they enhance the final result of the captured image. To boost the final captured image one should be aware of the importance and tactics to unlock the best car photography settings. Positioning the camera will allow the photographer to present his creativity which can be beneficial for the final result.
| Types of Photography | Aperture | ISO | Shutter Speed | Focal Length |
| Static Car Photography | f/4 – f11 | 100 – 200 | 1/500 – 1/1000 | 85-105mm |
| Commercial Car Photography | f/4.5 – f/7.1 | 50 – 400 | 1/125 – 1/250 | 50-100mm |
| Car Parts’ Macro Shots | f/5.6 – f/11 | 100-800 | 1/100 and higher | 50-180mm |
| Car Interiors | f/2.4 – f/5.0 | 400 – 1600 | 1/60 – 1/120 | 50mm – 100mm |
| Car Photography at Events | f/7.1 – f/11 | 100 – 800 | 1/160 – 1/250 | 35-60 mm |
| Car Photography in Race Tracks | f/11 – f32 | 100 – 400 | 1/200 – 1/800 | Up to 28mm |
Benefits of Using Correct Car Photography Settings
Car photography can be done simply however to enhance and empower the results you need to make some changes to your camera. To result in a good quality of photos, car photography settings play a vital role in the process. By making some changes to your camera you can improve your final results to the next level.
1. Control the depth field
You can control the focus of the car and background by adjusting the aperture. A wide aperture blurs the background and focuses on the car. However, keeping a narrow aperture will keep both the car and the background sharp.
2. Capture sharp images
To capture sharp car photos, one has to correct with the best shutter speed for car photography. Keeping the shutter speed slow in low light conditions will lead to blurting the image if the car moves or the camera shakes.
However, a fast shutter speed will freeze the actions and will provide you with crisp details.
3. Sustain image quality
You can use ISO, it is a camera’s sensitivity to light. To produce the cleanest image with minimal noise you have to keep the setting low i.e. ISO 100. However, in low light situations, you might need to raise ISO which will launch coarseness. To sustain the image quality you have to find the balance between shutter speed and ISO.
4. Attain detailed color
To achieve the images containing the true colors of cars. One should ensure the white balance, which will help the results appear natural. In different lighting conditions, the camera might struggle to capture the detailed results. That is why ensuring the white color balance is important.
5. Creative control
Modifying the camera to the best car photo editing settings will allow you to express your creative vision. Experimenting with settings can help to bring out the results equivalent to a photographer’s creativity.
Useful Tips for Improving your Car Photography
Camera settings will help you with car photography, but these Car Photography Tips are just the cherry on the cake!
1. Try the Bokeh Effect
Elements in the background often create a distraction in the photograph. The background can be blurred and the distraction can be offset with the Bokeh effect. To achieve this, set the aperture below f/4.To improve the DOF, you can alternatively get a closer shot of the car or use a longer focal length.
2. Use a wide-angle lens
Using the best camera for automotive photography and a wide-angle lens will help you capture the entire vehicle in detail. It will give you enough space to include the surroundings (if you want to), which is excellent for branding if you want to include your storefront or brand banner in the images.
3. Panning effect for motion blur
Panning is the best option for capturing a moving car. For panning, you must set the camera on a tripod (with a freely movable head) or a gimbal, lower the shutter speed to 1/60 and follow the vehicle as it moves around.
4. Shoot the car from different positions and angles
Shooting the car from different positions and angles will give you plenty of good pictures, some of which might be unique and pretty. To capture the best car photography angles, try shooting from a low perspective to emphasize the car’s presence and sleekness, experiment with side profile shots to highlight its contours, and consider aerial shots to showcase its surroundings and create a dynamic composition.
If you want to take things to the next level, use drones for high-level shots, or perhaps set your equipment up in another car!
5. Avoid reflections
Unless it’s not intentional, reflections are the foremost photograph-ruining factor. Cars usually have shiny bodies, due to which it is difficult to avoid reflections from different angles during a photoshoot
You can also use cameras attached to light meters and polarizers to control reflections. You can also avoid them by shooting inside a studio, where the light sources are all under your control.
6. Use creative composition
Image composition depends on your creativity; however, a creative car photography composition makes your car emerge as the main character of the photographs, as it rightly should. Experiment with light exposure, the selected frame, and the surrounding elements to get the best shot. You can also choose a theme for your photoshoot, one that matches your car or defines it, and then shoot accordingly.
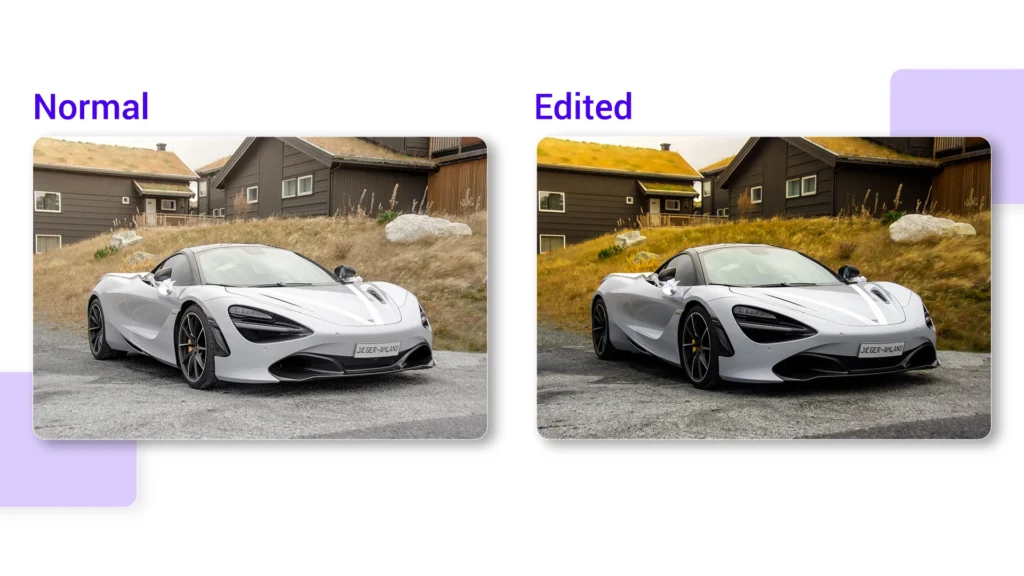
Best Post-Processing Settings for Car Photography
The best post-processing options for automotive photography let you enhance color, details, and overall aesthetics to produce attractive and powerful photographs. These methods will enable you to maximize the potential of your automotive photography, whether you choose to shoot in RAW for the greatest degree of versatility or to fine-tune particular aspects like white balance and saturation.
1) Shoot in RAW: Start by capturing your car images in RAW format. RAW files retain more data, allowing for more extensive editing without sacrificing image quality.
2) Adjust White Balance: Correct the white balance to ensure accurate color representation. This step is essential to maintain the true colors of the car.
3) Balance Exposure and Contrast: Strive for a well-balanced image by adjusting the exposure and contrast. This ensures that both bright and dark areas retain essential details.
4) Enhance Details: Use clarity and sharpening tools to enhance the car’s features, making them stand out and appear more defined.
5) Adjust Saturation: Carefully adjust the saturation to make colors pop without appearing oversaturated or unnatural.
6) HSL Adjustments: Fine-tune individual colors using Hue, Saturation, and Luminance adjustments to achieve the desired color balance and vibrancy.
7) Vignetting: Careful vignetting helps draw more attention to your car. However, overdoing it can ruin the shot.
8) Selective Noise Reduction: Apply noise reduction selectively to minimize e noise without sacrificing image sharpness.
9) Background: If needed, change or edit the background to highlight the car. Be patient here, as drawing a mask can be difficult. For best results, use a mouse and zoom in at 200%.
10) Removing Reflections and Other Elements: Unnecessary background elements and reflections sometimes distract focus. Thus, they must be removed with precision.
11) Cropping: Cropping improves composition, guiding the viewer’s eye toward the main subject, the car.
12) Creative Filters: Experiment with creative filters and presets to add an artistic flair, but exercise restraint to maintain a natural look.
13) Overall Colour Balance: Leveling out everything in the shot after editing is key. This extra little effort makes the whole picture come to life.
14) Final Touches: Pay attention to small details, remove any imperfections, and perform final adjustments to achieve a polished result.
Best Camera Equipment for Car Photography
The best camera equipment for car photography depends on your budget, shooting preferences, and the level of professional quality you seek. Whereas, any mirror-less camera or a high-quality DSLR with a good sensor, fast autofocus, and dynamic range can result in excellence in your car photography. Here’s a comprehensive list of equipment that can enhance your car photography:
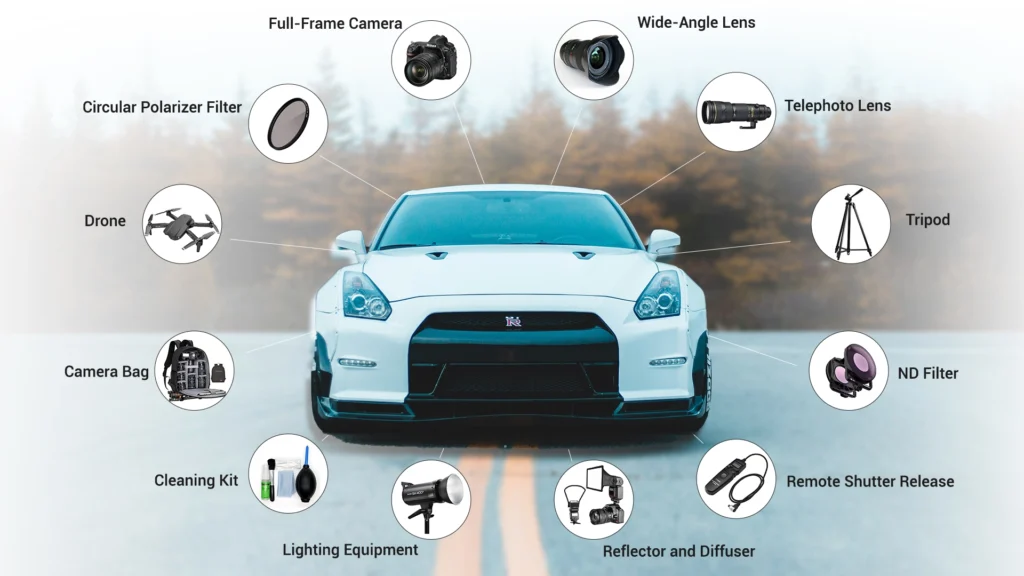
1) Full-Frame Camera: Cameras like Sony A7R IV, Sony A1, Nikon Z7 II, Nikon D850, or Canon EOS R5 offer high-resolution and excellent image quality, ideal for capturing fine details and dynamic range.
2) Wide-Angle Lens: A high-quality wide-angle lens is essential for capturing cars in their environment, such as the Sigma 24-70mm f/2.8 or the Canon EF 16-35mm f/2.8.
3) Telephoto Lens: A telephoto lens allows you to capture close-up shots of car details and compressed perspectives, like the Sony FE 70-200mm f/2.8 or the Nikon AF-S 70-200mm f/2.8.
4) Tripod: A sturdy tripod is essential for stable shots and long-exposure photography.
5) Circular Polarizer Filter: Reduces reflections and glare on car surfaces and enhances colors.
6) ND Filter: Useful for controlling exposure in bright conditions or achieving longer exposures.
7) Remote Shutter Release: Helps minimize camera shake during long-exposure shots.
8) Reflector and Diffuser: Helps control lighting and reduce harsh shadows.
9) Lighting Equipment: External flashes or continuous lighting for studio-style shots or light painting effects.
10) Cleaning Kit: Keep your car and camera equipment clean and free from dust and debris.
11) Camera Bag: A reliable and comfortable bag to carry your camera gear safely.
12) Drone: For aerial shots and dynamic perspectives, consider a drone like the DJI Mavic Air 2.
Remember that the best camera equipment may vary depending on your shooting style and the type of car photography you want to pursue, whether it’s studio-based, outdoor, action shots, or aerial photography. Invest in high-quality lenses and accessories that complement your camera, and don’t forget to adjust camera settings and experiment to develop your unique style.
Best Chrome Extension for AI Car Cataloging
The ultimate solution for car cataloging with a free Spyne Flip extension! Seamlessly organize and manage your automotive inventory like never before. Effortlessly upload images and data into our advanced platform, simplifying the entire cataloging process. Say goodbye to tedious manual entries and enjoy quick and accurate categorization. This ensures precision in capturing every vehicle’s details, saving your time and effort. Maximize your productivity and boost sales with this cutting-edge extension tailored for the automotive industry. Experience the future of car cataloging today with our innovative extension.
With our extension, you can automatically change your automotive catalog in a few simple steps:
1) Open your browser and search Spyne Flip extension
2) Add the extension to your inventory
3) After adding the extension, you can select the cars from your catalog
4) Click on “transform,” and the AI will automatically edit your car catalog. You can change the background, apply number plate masking, add window tinting, and much more.
Best Lighting for Car Photography
Lighting is one of those factors that can make or break car photography. While good lighting can make pictures appealing, dull lighting can completely steal its essence.
Thus, it is key to gain control over lighting settings for ideal photographs. However, factors may vary depending on location i.e. outdoor photography or studio photography. Let’s discuss each in detail:
Outdoor Car Photography Lighting
The first step here is to pick the right location. Find a place that not only offers great lighting but also a good background. Then follow these instructions to get the best pictures:
- Camera angles: Each car has a different size and profile. So, shoot the car from every angle to determine which works best.
- Time: It is important to pick a time when it’s not too bright or dark. Some believe the ideal time is 30-20 minutes before sunset.
- Polarizers: Reflections cause a major hindrance during outdoor sessions. In this case, putting a polarizer on the camera can help. Simply twist the polarizer to create the perfect balance.
- Strobes: While gorgeous natural light may eliminate the need for a strobe, it is always a good option. Just adding a touch of strobe opens up the shadows and makes the car pop. Make sure to move it around and find a suitable angle.
- Shutter Speed: This plays a crucial role in capturing light, freezing motion, and getting sharp details. For static shots, fast shutter speed works best. However, motion shots need a slower shutter to blur out the background while keeping the car clean.
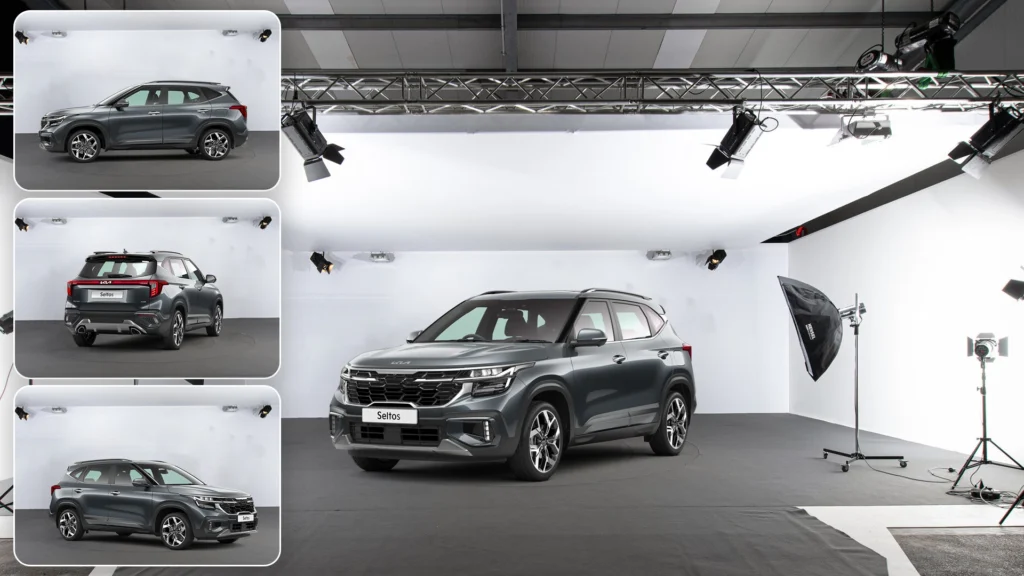
Indoor/Studio Car Photography Lighting
Outdoor photography may seem like the best option for car photography due to natural light, but that’s not entirely true. Indoor photography is often equally good, albeit better for some situations. Mainly because studio lights offer more control. They’re available at any time and not influenced by weather. Here’s everything you need to know to make the most of these:
- Continuous Light or Speedlights/Flashes: On one hand, continuous lights are easily adjustable, and speed lights offer better control over light intensity. Flashes also have high power and are suitable for short exposure time.
- Choosing the Right Lighting Technique: The proper lighting technique helps achieve the best images. Direct frontal lighting lights up everything that faces the camera. Side lighting, adds texture and emphasizes lines. Additive lighting enhances curves and features to distinguish the car’s design. While subtractive lighting reduces the light reflected from the car’s surface. One must pick a technique based on their needs.
- Light modifiers: Light modifiers or softboxes soften the lighting and reduce hard reflections on the automobile. Ensuring the car remains the main point of attraction.
- Use of Indirect Lights: These are another way to control the reflections on the car’s surface. It also adds beautiful gradient lighting when done right.
- Experimenting with Shutter Speeds: Since the car is mostly stagnant, fast shutter speeds work best indoors. They also cut out any ambient light that impacts the shot.
A Quick Word on Lighting Your Car
Whether indoor or outdoor, the best photography results are achieved when the automobile is the hero of the shot. This can be done by controlling lighting and blending creative techniques for both settings. For instance, one can pair natural light with studio modifiers. This helps get pictures that stand out and leave a lasting impression. Additionally, using the best camera setting for car photography and Lightroom presets for car photography is another bonus.
Best Composition for Car Photography
Use the rule of thirds and other composition strategies to generate aesthetically appealing and interesting photographs to obtain the best composition for vehicle photography.Embrace leading lines, negative space, symmetry, and reflections to guide the viewer’s eye and add depth to the images. Additionally, incorporating the car’s environment can help tell a compelling story and give context to the photograph.Experiment with various angles and perspectives to capture dynamic shots that showcase the car’s best features. Mastering these techniques will enable you to produce stunning and captivating car images that resonate with viewers.
How to Prepare for an Automotive Photography Shoot?
Preparing for an automobile shoot beforehand not only simplifies the process but also helps beat challenges. Here is an entire step-by-step breakdown of shoot preps:
- Know the automobile: Every car has a different shape, size, and design. Studying these helps emphasize elements like logos, curves, and tech features. For inspiration, one can also look at similar car shoots.
- Pick the right location: Choose a good location for photography. It can instantly make photos stand out. However in the case of outdoor settings, one must also choose a time for good natural lighting.
- Prepare your Gear: Cameras, lights, and other equipment must be packed beforehand. It is also important to pack extra accessories like batteries, memory cards, and cleaning kits. Knowing the best camera setting for car photography further elevates results.
- Plan shot list: Every camera angle presents a different image of the automobile. Creating a shot list ensures one captures every angle, feature, and detail. Hero shots, close-ups, and action shots should also be included for best results.
- Be ready for challenges: Despite all prep work, last-minute problems are inevitable. Thus, one must always be prepared to face them, be it mentally or physically.
Don’t Forget These Tips for Good Car Shots
When it comes to car photography, experimenting is the key. Trying different angles, lighting, and styles helps us gain great results. Additionally, here are some quick tips that instantly boost pictures:
- Golden Hours gives the best results: During outdoor shoots, timing is everything. However, the golden hours is believed to be the ideal time by many. It occurs just after sunrise and before sunset when the sunlight has a golden tint. This warm hue enhances the car’s features and creates beautiful reflections.
- Everything should complement the car: Since the car is the main point of attraction, everything must complement it. Be it camera angles, background, or lighting. They must be such that they enhance the car’s features and design.
- Details matter: Getting small car details like logos and various angles piques the viewer’s interest.
- Framing the shots: Different frames grab attention. Thus, one should employ the rule of thirds and place the car off-center for more dynamics. Further, man-made frames can be created with trees or bridges.
- Post Processing and Editing: The editing done after photography also determines its appeal. By knowing lightroom presets for car photography one can enhance their car shots.

Organize and Fine-tune Your Shots in Spyne
No matter how beautiful your shots appear when clicked, organizing and fine-tuning only makes them better. That is because it’s not just about the aesthetics but rather about creating a captivating experience. One that convinces the viewers to take action and inquire further. However, fine-tuning every picture at hand by yourself is tedious and draining.
This is where Spyne’s image editing service comes into play. It helps quickly organise photos and enhance them. Thus, you can adjust elements and transform pictures into professional-grade visuals in no time. Take a demo now to discover the perfect blend of precision and convenience with Spyne.
Conclusion
In conclusion, understanding and adjusting camera settings are crucial for achieving stunning car photography results. Shooting in RAW format and using the right camera equipment, along with proper lighting and composition, can elevate your car images to a professional level. By following the provided recommendations and tips, car photographers can capture the beauty of vehicles and create captivating images that resonate with viewers. Practice and experimentation are essential to developing a unique and compelling style in car photography.