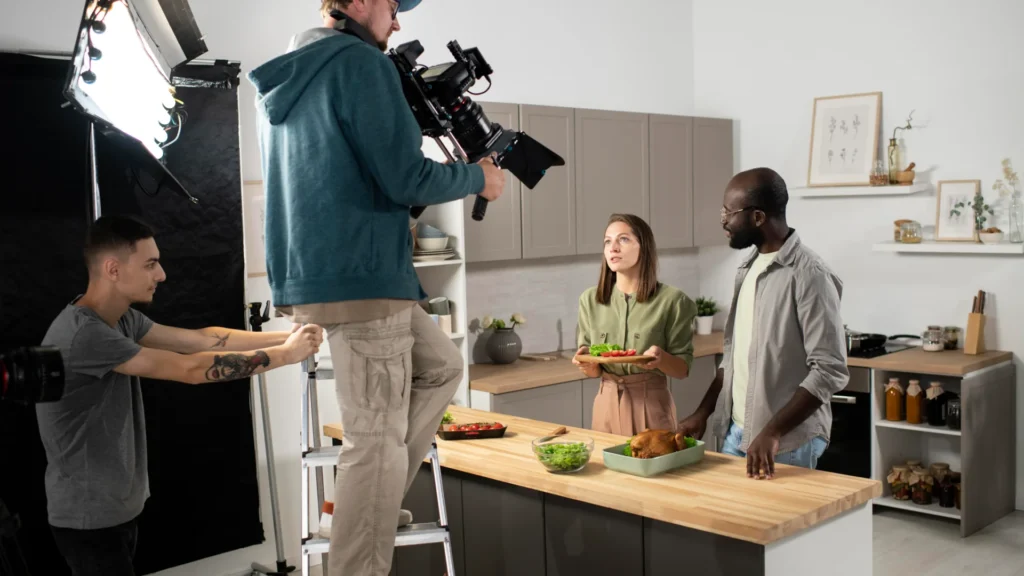
Food photography is a field that requires both technical and artistic skills. It is a form of commercial photography that seeks to capture the visual appeal of food, making viewers want to eat it. Food Photography Studio is a dedicated space where professional photographers can capture high-quality food images for commercial purposes. The studio has professional lighting, sets, props, and equipment such as cameras, lenses, and tripods.
Whether you’re a professional food photographer or a food lover looking to improve your food photography skills, the Food Photography Studio blog is an excellent source of inspiration, education, and entertainment.
What is Food Photography Studio?
A food photography studio is a dedicated space to capture high-quality food images. It is a controlled environment where professional photographers, food stylists, and other creative professionals work together to create visually appealing and enticing food photographs. Food photographers often collaborate with food stylists who specialize in arranging and presenting food aesthetically pleasingly. They work together to make the food look visually appealing, fresh, and appetizing through techniques like garnishing, arranging ingredients, and using props that enhance the overall composition.
In a food photography studio, various elements are carefully considered to ensure that the food looks its best in the photographs. These elements may include lighting, composition, props, backdrops, and overall styling. The studio has specialized lighting equipment, cameras, lenses, and other necessary tools to achieve the desired results.
Professional photographers commonly use food photography studios for various purposes. It includes advertising campaigns, cookbooks, menus, food packaging, and online platforms such as food blogs, websites, and social media. These studios provide a controlled environment where photographers can experiment with different lighting setups, angles, and compositions to capture the essence and beauty of food.
How to Create a Professional Food Photography Studio
Creating a professional studio requires careful planning, investment in equipment and props, and attention to detail. Here are some food photography ideas for the studio:
- Choose the suitable space: A food photography studio should have ample room for setting up equipment and props and be well-lit. Natural light is ideal for food photography, so consider a space with large windows or skylights. You may need to invest in artificial lighting if you are still looking for an area with good natural light.
- Invest in equipment: A professional food photography studio requires specialized equipment, including a high-quality camera, lenses, tripods, and lighting equipment. Consider investing in a camera that can capture high-resolution images, such as a DSLR or mirrorless camera, and choose lenses to capture close-up shots of food.
- Choose props and backdrops: Props and backdrops are important to food photography. Choose props that complement the food you are photographing and add visual interest, such as plates, utensils, and napkins. Backdrops, such as a wooden table or white marble, should be neutral and complementary to the food.
- Plan food styling: Food styling is an important aspect of food photography. Work with a food stylist or learn to style food to create visually appealing dishes. Consider color, texture, and composition when styling food for photography.
- Edit and retouch images: Once you have captured your photos, edit and retouch them to enhance their quality. This may include adjusting color balance, brightness, and contrast and removing any imperfections or blemishes.
Basic Gear you Need for Food Photography Setup
If you’re looking to start taking food photography seriously, some basic gear can help you set up a proper food photography setup for your home or studio:
- Camera: A high-quality camera is essential for food photography. A DSLR or mirrorless camera with a large sensor and good low-light performance is ideal.
- Lens: A lens with a moderate focal length, such as a 50mm or 85mm lens, is often used for food photography. A macro lens may also be useful for capturing close-up shots of food.
- Tripod: A tripod is essential for keeping the camera steady during shots and for maintaining consistent framing. A sturdy tripod with a ball head is ideal for food photography.
- Lighting equipment: Lighting equipment is important for creating even, flattering light for food photography. A softbox, reflector, and diffuser can help to create soft, diffused light that minimizes harsh shadows.
- Backdrops and props: A neutral, textured backdrop is important for creating an attractive setting for the food. Props such as plates, utensils, and napkins can add interest and variety to the images.
- Editing software: Post-production editing software such as Adobe Lightroom or Spyne can be used to adjust color balance, brightness, contrast, and other aspects of the images.
The Basic Light Setup for Food Photography
When it comes to food photography, lighting is crucial in making the food look as delicious as possible. Here’s a basic light setup you can use for food photography:
- Natural light: Natural light can create beautiful, diffused lighting for food photography. Set the table near a large window and use a sheer white curtain or diffuser to soften the light. Position the food so that it is illuminated from the side.
- Artificial light: Artificial lighting can also create soft, even lighting for food photography. A softbox or umbrella can diffuse the light and create even shadows. Position the light to illuminate the food from the side at a 45-degree angle.
- Reflector: A reflector can bounce light back onto the food and minimize shadows. A white foam board or mirror can be positioned opposite the light source to bounce light back onto the food.
- Diffuser: A diffuser can soften the light and create even shadows. A translucent white sheet or diffuser can be positioned between the light source and the food to soften the light.
- Fill light: A fill light can add light to the shadows and create even lighting. A more minor, less powerful light source, such as a desk lamp or flashlight, can add fill light where needed.
Most Common Type of Lighting for Food Photography
Diffused natural light is the best and most convenient lighting for food photography. Natural light is typically soft, flattering, and easy to work with. Many food photographers prefer to use natural light because it can create a beautiful, natural-looking image that highlights the texture and color of the food.
When using natural light, photographers often position the food near a large window and use a sheer white curtain or diffuser to soften the light and minimize harsh shadows. The food is typically positioned to be illuminated from the side rather than directly in front of or behind the window.
While natural light is the most common type of lighting for food photography, artificial lighting can also be used to create beautiful, high-quality images. Artificial lighting can create soft, even lighting that highlights the food and minimizes harsh shadows. The choice of lighting for the food photography studio setup will depend on the photographer’s style, preferences, and the specific requirements of the shoot. Both natural and artificial lighting can be used to create beautiful, appetizing images of food.
How Lighting Modifiers can Improve your Food Photography
Lighting modifiers can significantly improve food photography by shaping and controlling light quality, direction, and intensity.
- Soften harsh light: Lighting modifiers such as softboxes and diffusers can soften intense light and create a more natural, even lighting that highlights the texture and color of the food.
- Control direction of light: Reflectors can bounce light onto the food from different angles, while flags or black foam boards can block light and create more dramatic shadows.
- Enhance color and texture: Colored gels or filters can be used to add tint, warmth, or other color effects to the lighting while adding texture to the modifiers can create interesting patterns and shapes in the light.
- Create highlights: Reflective surfaces such as silver or white cards can be used to add highlights and create the appearance of gloss and sheen on the food.
- Add depth: Photographers can add depth and dimension to the images by using a combination of lighting modifiers. This creates a sense of depth and texture that draws the viewer’s eye to the food.
How to Setup a Home Food Photography Studio
Setting up a home food photography studio is easier. Here are some steps to consider when setting up a studio:
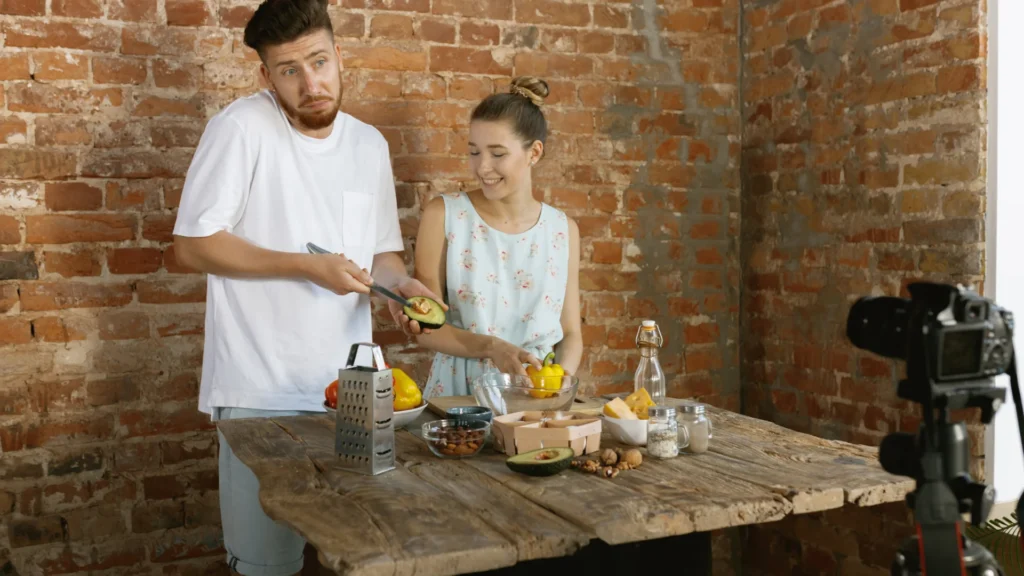
- Choose a space: Choose a space in your home with plenty of natural light or where you can easily control artificial lighting. Consider a space close to a window or with plenty of room to set up lighting equipment.
- Gather equipment: You will need essential photography equipment such as a camera, tripod, and lenses, as well as lighting equipment such as softboxes or umbrellas, light stands, and reflectors. Invest in props such as plates, napkins, and cutlery to add visual interest to your images.
- Set up your space: Set up a table or surface for your food and arrange your props and lighting equipment. Position your table near a window or set up artificial lighting to create even, soft lighting that highlights the food and minimizes harsh shadows.
- Style your food: Prepare your food and style it on your chosen surface or plate. Consider your dish’s colors, textures, and composition, and use props to add visual interest and create a mood or theme.
- Take your photos: Use your camera and tripod to take photos of your styled dish, experimenting with different angles, lighting setups, and props. Make adjustments to create the desired look and feel for your images.
- Edit your photos: Use photo editing software to enhance your images, adjusting color, exposure, and contrast as needed. Be careful not to over-edit your images and maintain a natural, appetizing look.
Go behind the scenes of other food photographer masterclasses or academies to see how to build your studio for your food photography.
Equipment for Food Photography Studio
If you are setting up a food photography studio, you will need specific equipment to capture high-quality images. Here are some must-need tools you should consider:
- Camera: Consider a DSLR or mirrorless camera with a wide aperture lens (such as 50mm or 35mm) for capturing sharp, detailed images of your food.
- Tripod: A sturdy tripod is important for keeping your camera stable and preventing blurry images. Choose a tripod with adjustable legs and a ball head for easy positioning.
- Lighting: Lighting is important for creating even, soft lighting that highlights the food and minimizes harsh shadows. Consider using a combination of natural light and artificial lighting, such as softboxes, umbrellas, or LED panels.
- Backdrops and surfaces: Choose a few different surfaces and backdrops for your food photography studio, such as wooden boards, marble slabs, or plain white or colored paper. Make sure to clean and prep your surfaces before each shoot.
- Props: Props such as plates, cutlery, napkins, and food styling tools can add visual interest and enhance the composition of your photos. Consider choosing props that complement the color and texture of your food.
- Reflector and diffuser: These tools can be used to control the light and reduce harsh shadows. A reflector can bounce light onto the food from a specific angle, while a diffuser can soften and spread the light for a more natural look.
There are also many different food photography rental studios that you can try out in starting phase of your photography.
Lighting Setup for Food Photography
Lighting is a critical component of food photography. The right lighting setup can help enhance your food’s colors, textures, and details. Here are some lighting setups to consider:
- Natural light: Natural light can be a great option for creating soft, even lighting for your food photography. Prefer a room with larger windows in a home that receive plenty of natural light. Choose a time of day when the light is soft and diffused.
- Artificial lighting: Artificial lighting can be used to supplement or replace natural light. This can be controlled to create specific effects. Consider using softboxes, umbrellas, or LED panels to create even, diffused lighting that highlights the texture and color of your food.
- Lighting placement: Position your light source to the side or behind your food rather than directly overhead. This creates a more natural look and minimizes harsh shadows.
- Light modifiers: Use light modifiers such as diffusers, reflectors, or flags to shape and control the light, adding depth and dimension to your images. For example, a diffuser can be used to soften the light and create a more natural look, while a reflector can bounce light onto the food from a specific angle.
- White balance: Adjust your white balance setting to ensure that the colors in your images are accurate and true to life. This can be done manually or through automatic white balance settings in your camera or editing software.
When setting up your lighting, you must experiment with different angles, distances, and intensities to find the best setup for your specific shoot.
Thoughtful Compositions for Mouthwatering Food Photography
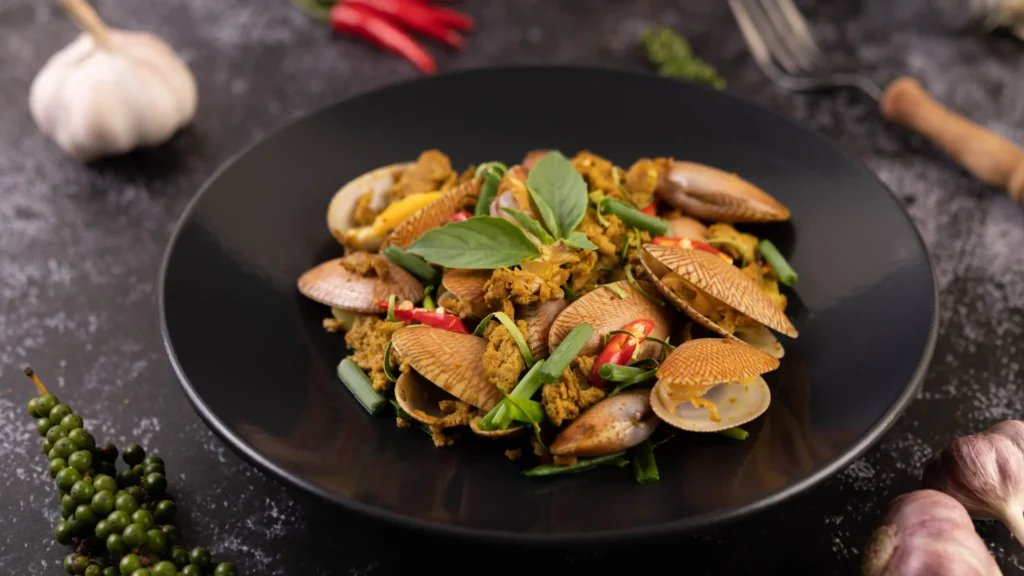
Creating mouthwatering food photography involves more than just capturing the food itself. It’s also important to consider the shot’s composition, including the placement of the food, the use of props, and the overall arrangement of the elements in the frame. Here are some tips for thoughtful compositions in food photography:
- Angles and perspectives: Try to click with different tips and outlooks to create interest and variety in your shots. Try shooting from above, straight on, or at a 45-degree angle to capture various aspects of the food.
- Negative space: Use negative space to create breathing room around your subject and draw attention to the food. Consider leaving space in your frame or using a plain background to contrast and highlight the food.
- Color and texture: Use color and texture to create visual interest and highlight the unique qualities of the food. Consider using complementary colors, contrasting textures, garnishes, and toppings to create a dynamic and visually appealing composition.
- Props and context: Use props and context to create a story or context around the food. Consider using utensils, plates, or other food-related objects to add depth and engagement to your shots.
Lesson Activity
Learning to use a good photography studio setup and approaching brands for your photography services requires dedication, skill, and a strong business mindset. By focusing on building your skills, creating a solid portfolio, and networking with other professionals, you can make a successful career in food photography.
- Research: Research different food photography studios in your area and their services. Consider attending workshops or classes to learn more about food photography techniques and best practices.
- Practice: Use your equipment or rent a studio to gain experience and develop your skills. Experiment with different lighting setups, compositions, and styles to find what works best.
- Portfolio: Build a strong portfolio of your work to showcase your skills and style. Select your best images and organize them in a visually appealing way. Consider creating a website or social media page to showcase your portfolio and reach a wider audience.
- Approach Brands: Identify brands and businesses interested in your services and create a pitch to approach them. Consider reaching out through email or social media. Give examples of your work and a brief explanation of how you can help them with their photography needs.
- Networking: Attend photography events and conferences to meet other food professionals and build your network. Consider collaborating with other creatives, such as chefs or food stylists, to expand your portfolio and create relationships.
- Contracts and agreements: Once you’ve secured a client, establish clear contracts outlining expectations, deliverables, and payment terms. Always contact a lawyer to ensure your arrangements are legally binding and protect your rights as a photographer.
Virtual Studio
A virtual studio is a digital environment that allows photographers to use computer software to create and manipulate a photo shoot’s backgrounds, lighting, and other elements. This technology allows photographers to create a variety of different sets, scenes, and backgrounds without the need for a studio or physical location. It acts as a food photography home studio.
Virtual studios are often created using specialized software. It allows photographers to place subjects in pre-existing digital environments or create new ones from scratch. These environments can include everything from simple backgrounds to complex 3D models. It can be customized to meet the specific needs of a shoot. It acts like a mini studio for food photography.
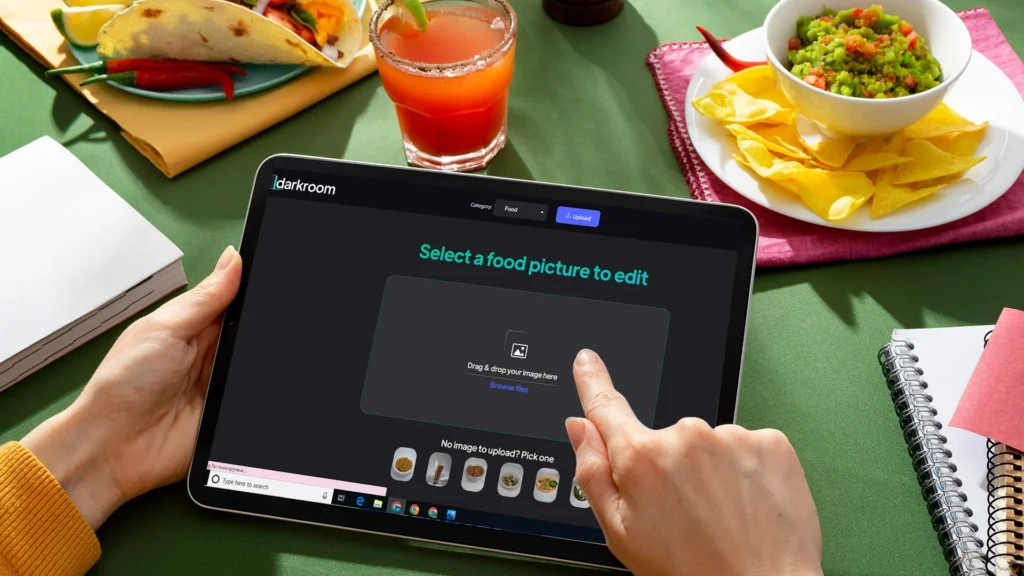
Why Spyne’s Virtual Studio?
Spyne is a company that provides a virtual studio platform for food photographers and businesses. Their virtual studio platform offers a range of tools and features that allow photographers to create and customize digital environments for their photo shoots.
Spyne’s virtual studio allows photographers to choose from a variety of predefined backgrounds or create their own custom backgrounds. They can also adjust lighting, shadows, and other environmental factors to create a specific look and feel for their photos.
There are several advantages to using Spyne virtual studio over any other photo studio, including:
Cost: Virtual studios are often more affordable than traditional photo studios because they don’t require the same equipment or physical hardware space.
Flexibility: With a virtual studio, you can create a variety of backgrounds and sets without moving equipment or props. This makes it easier to swap between various configurations and adapt to the needs of different customers.
Accessibility: Virtual Studio lets you work with customers around the world without requiring them to travel to a physical location. This is particularly useful for customers who are remote or have reduced mobility.
Efficiency: A virtual studio simplifies the photography process. It allows you to view and edit images instantly while you shoot, without waiting for film to be developed or images to be transferred to your computer.
Overall, Spyne’s virtual studio platform is helpful for photographers and businesses looking for high-quality images in a controlled and customizable environment. It offers a range of food photography ideas and services that can help simplify the photography process and deliver stunning results.